
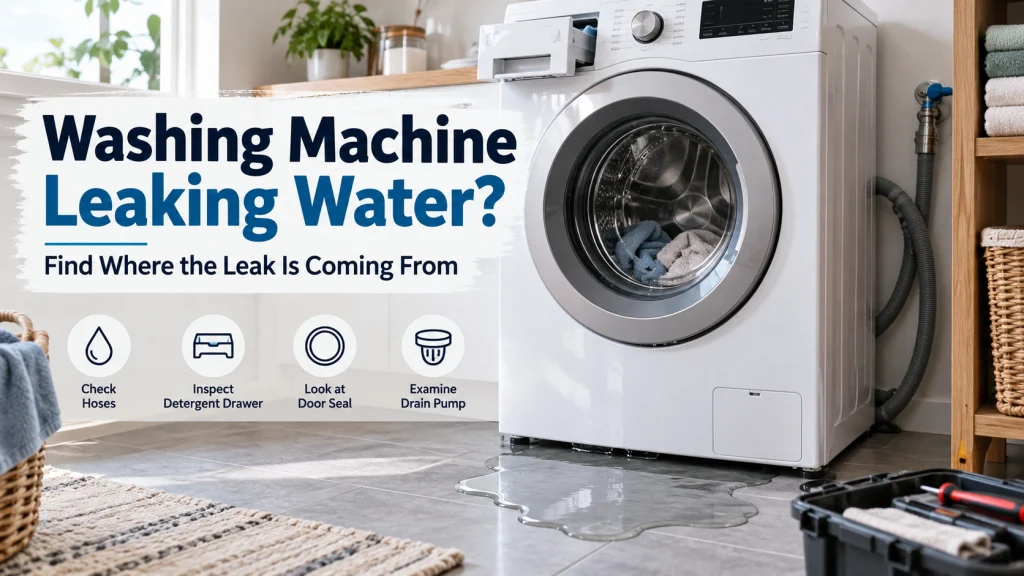
If your washing machine is leaking water, the puddle on the floor feels like a location clue. It often is not. Water can run down a hose, follow the cabinet edge, collect in the base and finally appear on the opposite side of the machine from the actual leak. The more useful clue is usually when the first fresh water appears: while the washer is sitting idle, while it fills, during tumbling or agitation, when the drain pump starts, or only as the drum reaches high-speed spin.
That timing separates several faults that look identical once the floor is wet. A loose inlet connection can mimic an internal leak. A detergent drawer can overflow and track down the front. A pump-filter cap that was not reseated properly can leak only during draining. A damaged door seal may drip during wash movement. A deeper internal leak can show itself only when the tub moves hard during spin.
This guide starts with the checks that do not require opening the cabinet. It is designed for both front-load and top-load machines, with US and UK differences called out where they matter. If your problem is broader than a leak, start with Washing Machine Troubleshooting: Diagnose Common Problems by Symptom.
Quick answer: Dry the floor and the outside of the machine, then identify the stage when the first fresh water appears. A leak while the washer is idle points first to the household supply, tap/faucet, inlet hose or inlet valve. A leak during fill points to inlet connections, the dispenser path or overfilling. A front-door leak points to debris, trapped laundry or a damaged seal. A leak that starts when the pump runs points to the drain hose, filter housing, pump or household drain. Water that appears only during high-speed spin needs closer attention to the drain path, door seal, tub movement and internal seals.
Safety first: Stop using the washer if water is pouring out, reaching the plug/socket or outlet, entering electrical parts, or the machine trips a breaker, GFCI or RCD. Turn off the water supply and disconnect power only if you can do so without standing in water. Do not remove panels for a powered leak test. Live electrical testing and internal leak tracing with the machine energised belong with a suitably trained technician.
In this guide 18 sections
Use the timing before the puddle location
The quickest way to narrow a washing machine leak is to write down the first moment you see new water. Do not wait until the programme ends and then judge only by where the puddle has spread.
| When fresh water first appears | What moves higher on the list | First safe check |
| While the washer is off or between cycles | Tap/faucet, inlet hose, hose washer, inlet valve | Dry the rear connections and check whether dampness returns with the supply left on |
| As soon as filling starts | Inlet hose/connection, inlet valve, dispenser/drawer path, overfill | Watch the external rear connections and dispenser area with the cabinet fully closed |
| During wash or agitation | Door seal, trapped fabric, detergent drawer overflow, excess suds, internal hose/tub leak | Check door/seal and dispenser externally; note whether the leak follows drum movement |
| When the drain pump starts | Drain hose, standpipe/backflow, pump filter cap/seal, pump or internal drain hose | Check drain hose and household drain; inspect the owner-accessible filter only as the manual allows |
| Only at high-speed spin | Residual water/drain issue, door seal, internal hose/tub movement, tub seal/bearing area | Confirm the washer drained fully and note whether there is rumbling, drum play or severe vibration |
The first-drop test is more useful than chasing the puddle
If the leak is small, repeatable and clearly away from electrical parts, you can often learn more from one short supervised observation than from pulling the machine apart. Keep every panel and cover fitted.
- Dry the floor, the front of the cabinet, the door area, the detergent drawer, and the visible hose connections at the back.
- Check for dampness before starting a cycle. If water reappears while the machine is idle, the wash programme is not the cause.
- Use a short rinse or quick cycle only if the existing leak is minor and it is safe to do so. Watch for the first new drop, not the final puddle.
- Note both the cycle stage and the highest wet point you can see. Water runs downwards, so the highest fresh wet point is usually more useful than the lowest puddle.
- Stop the test immediately if the leak becomes more than a small drip, reaches electrical areas, or you are no longer sure where the water is going.
A simple external trick can help with hose connections: after drying them, wrap a strip of dry tissue around each accessible coupling. Beko uses a similar tissue check in its installation guidance. If the tissue becomes wet while the surrounding cabinet stays dry, you have narrowed the problem without opening anything.
If it leaks while the washing machine is switched off
A washer that develops fresh water underneath while it has not been running gives you a valuable clue. Most of the wash and drain system is inactive. The supply side remains under household water pressure as long as the tap or faucet is open.
- Check the tap/faucet itself. Water can run down a pipe or hose and look as if it came from the appliance.
- Check both ends of each inlet hose. A loose connection, damaged rubber washer or cracked hose can weep continuously.
- Look along the hose, not only at the ends. Bulging, cracking, chafing or a wet braid means the hose should be replaced rather than tightened harder.
- If the outside connections stay dry but water continues to appear, an inlet valve or another internal supply-side part becomes more plausible. That is a service-level diagnosis on most machines.
Do not attack a leaking inlet connection with pliers. Current AEG and Electrolux guidance specifically warns that inlet connections should be tightened by hand because overtightening can damage threads or seals. Check the exact installation instructions for your machine.
If the leak starts while the machine is filling
Fill-stage leaks are among the easiest to narrow because the drain pump has not yet become the main actor. Start outside the machine before assuming the tub has cracked.
1. Inlet hose connections and rubber washers
Samsung UK notes that the rubber washers at the fill-hose connections matter for a watertight seal. Whirlpool, Beko, AEG and Electrolux give the same basic diagnostic direction: check the tap/faucet end, the washer end, the hose condition and the sealing washers before moving deeper into the appliance.
A connection can also fool you because water travels along the hose before dropping. Dry it completely, then check which point becomes wet first. If the connector is cross-threaded, the washer is missing, or the hose is visibly damaged, replacement or correct reinstallation is safer than simply applying more force.
2. Detergent drawer or dispenser path
If water appears at the front upper corner during fill, open the possibility that it is coming from the detergent drawer rather than the door. Detergent residue, limescale, a blocked channel, a misplaced insert or a small object in the dispenser path can make incoming water back up and spill over. Electrolux specifically lists a blocked detergent drawer as a common leak cause, and repair threads repeatedly show objects or residue in dispenser paths creating surprisingly large leaks.
Remove and clean only the parts your manual says are removable. Make sure liquid/powder inserts are in the correct position for the detergent you use. Pods normally belong in the drum unless your manufacturer provides a dedicated pod compartment.
3. Overfilling is different from a hose leak
If the water level itself looks abnormally high, or the washer keeps taking in water instead of stopping at the expected level, stop the cycle. A water-level sensing or inlet-valve fault can overfill the machine and is not something to diagnose by letting it continue until it spills. Maytag also flags overfilling and water-level control faults as reasons to move towards professional service.
If water is leaking from the front door
On a front loader, do not condemn the rubber door seal the moment you see water below the door. First work out whether the water is genuinely crossing the door-seal interface or merely running down from the dispenser above it.
- Wipe the door glass and the sealing lip clean. Hair, lint, grit and detergent residue can prevent an otherwise healthy seal from making full contact.
- Check the folds of the gasket for coins, hairpins, small socks or other trapped items. Whirlpool and LG both call out debris in the gasket as a leak cause.
- Look for a cut, puncture, split or distorted section of rubber. A damaged seal should be replaced rather than glued as a permanent repair.
- Check for clothing trapped across the seal. A sleeve, drawstring or small item can wick water outside even though the door appears shut.
- Consider the load. Electrolux notes that overloading can prevent the door from sealing properly. If the leak appears only with a packed drum or one bulky item, correct the loading before ordering a door seal.
If the machine rocks badly on its feet, correct the installation as well. Whirlpool lists an unlevel washer as a possible contributor to door-seal leakage. Severe movement can also make an existing marginal seal leak more obviously.
Too much detergent can create a leak without a broken hose
Oversudsing is easy to dismiss because it sounds too simple for a puddle on the floor. It is also documented by multiple manufacturers. Whirlpool, Samsung, LG and Electrolux all warn that excess or unsuitable detergent can contribute to leaks or foam escaping from places that normally stay dry.
The clue is foam. If you can see a heavy mass of suds through a front-loader door, foam around the dispenser, or soapy water where the leak appears, detergent dosage deserves attention before parts. This is especially relevant after changing detergent, moving to softer water, using concentrated liquid, or switching on an automatic dosing system.
For US high-efficiency washers, use HE detergent where the manual requires it. In the UK, use detergent intended for automatic washing machines and dose for the actual load and local water hardness. More detergent does not improve cleaning once the correct dose is reached. It can make rinsing harder and create leak-like symptoms.
If it leaks when the washer drains
A leak that begins at the exact moment the drain pump starts is a different fault path from a leak during fill. The inlet system moves down the list. The drain hose, pump-filter housing, pump, internal drain hoses and the household standpipe or sink connection move up.
Start with what you can see. Check the external drain hose for splits, abrasion, loose securing points and a connection that has worked free. Then watch the household drain. If the standpipe or sink connection backs up and spills when the pump sends water out quickly, the washing machine may be pumping normally into a blocked household drain.
If your model has an owner-accessible pump filter, check whether the leak began after the filter was recently cleaned. LG and Electrolux both warn that a filter or residual-drain cap that is not correctly refitted can leak. Clean the sealing surface and reinstall the cap exactly as your manual describes. Do not assume every top loader has a user-removable filter.
If drainage is also slow, water remains in the drum, or the washer repeatedly fails before spin, deal with the drainage problem first. Follow Washing Machine Not Draining? Diagnose the Blockage, Pump or Drain Problem. Once the machine drains normally, run a short rinse cycle and watch again for the first fresh sign of water. That makes it much easier to tell whether the leak was caused by the drainage fault or whether a second leak is still present.
If it leaks only during spin
“Only on spin” does not automatically mean a bad tub seal. High-speed spin changes three things at once: the machine has usually just drained, the tub moves more aggressively, and any remaining water is being thrown around at far higher speed. Use those clues in order.
- First confirm that the washer actually drained. If water remains, a slow or restricted drain can leave more water inside than the spin stage was designed to handle.
- Check whether the leak starts as the drain pump runs before full spin speed. If it does, stay on the drain-hose/filter/pump path rather than jumping to bearings.
- On a front loader, recheck the door seal for a small cut or debris that leaks only when water is thrown against that section at speed.
- Notice whether the machine is also banging, walking or badly out of balance. Tub movement can pull on an already damaged internal hose or make an existing seal leak more strongly.
- If water appears from the centre underneath and the machine also has a deep rumble, grinding, visible drum play or metal contact, stop using it. A tub-seal, bearing or drum-support fault becomes more plausible and continuing can turn one repair into several.
If the washer drains completely but still refuses to reach normal spin speed, follow Washing Machine Not Spinning? Diagnose the Real Cause Before Replacing Parts. A machine that will not spin needs a different set of checks from one that is simply leaking, and the two symptoms can sometimes happen at the same time.
What “leaking from underneath” actually tells you
Finding water under the washer does not tell you where the leak started. Water can run along hoses, panels and the base before it reaches the floor, so look for the first fresh drop rather than judging the source by the final puddle.
Before assuming the source is underneath, look for a vertical trail. Water from a rear inlet connection can run down the back panel. Water from a detergent drawer can travel behind the front fascia. A door leak can follow the lower cabinet edge. A standpipe can overflow behind the washer and run underneath it. The floor itself can carry water to the lowest point.
The bottom location becomes more meaningful only after the external upper paths stay dry and the timing points to the drain or internal tub system. Beko lists pumps and internal drain pipes among likely causes of a true underside leak, while Maytag adds outer-tub and tub-seal faults to the deeper possibilities. Those are reasonable service-level suspects, not reasons to order a pump or seal before tracing the leak.
Front loaders and top loaders need slightly different thinking
| Area | Front loader | Top loader |
| Door/lid leak | Door boot/gasket, glass, trapped fabric and door alignment are major clues | No front door boot; concentrate on fill level, tub ring/splashing, hoses, pump and internal water path |
| Pump filter | Often owner-accessible behind a lower flap, but not always | Frequently not owner-accessible; do not hunt for one unless the manual shows it |
| Overloading | Can hold clothing across the door seal or distort how the load sits | Can increase splashing/imbalance; some faults appear only with a full tub |
| Internal leak clues | Water can track behind the front panel and emerge at the base | Pump, tub-to-pump hose, outer tub and fill system remain common internal paths depending on design |
Did the leak start after cleaning, moving or installing the machine?
A recent change can be more useful than the age of the appliance. If the washer was dry for years and leaked immediately after someone touched it, revisit what changed before assuming a new part failed by coincidence.
- After cleaning the pump filter: check the filter cap, O-ring/sealing surface and emergency-drain hose cap. One grain of grit or a cap that is not fully seated can leak during draining.
- After moving the washer: inspect inlet and drain hoses for stretching, crushing or a connection that rotated loose. Recheck levelling as well.
- After a new installation: confirm the correct hose washers are present, the hoses are routed without kinks, and the drain hose is installed to the exact height and insertion rules in the manual.
- After changing detergent: look for oversudsing or dispenser overflow before blaming the door seal.
- After plumbing work: sediment can reach inlet screens, and a household drain can become the real source of an apparent washer leak.
US and UK differences worth keeping in mind
The diagnostic logic is shared, but plumbing and terminology differ enough that universal installation numbers are risky.
- Many current UK machines are cold-fill only. US machines commonly have hot and cold supply connections, although designs vary.
- In the US, manuals commonly use terms such as faucet, outlet, breaker and GFCI. In the UK, the equivalent wording is more often tap, socket, consumer unit and RCD.
- Drain-hose height and standpipe insertion limits vary by brand and model. Samsung US, Samsung UK, Beko and other manufacturers publish different dimensions for different machines. Use your installation manual, not a number copied from a forum.
- Detergent labelling differs, but the principle is the same: use detergent intended for your machine type and dose it for the load and water hardness.
A diagnostic order that avoids replacing the wrong part
1. Stop the water damage first. If the leak is significant, shut off the supply and stop using the washer.
2. Dry everything you can see, then check whether fresh water appears while the machine is idle.
3. If safe, identify the first leaking stage: fill, wash/agitation, drain or spin.
4. Trace upward from the puddle to the highest fresh wet point. Check external hoses and household plumbing before internal parts.
5. For a front-door leak, clean and inspect the seal and glass before ordering a gasket.
6. For a drain-stage leak, inspect the external drain hose, household drain and owner-accessible filter/cap before assuming the pump has failed.
7. If detergent foam is obvious, correct detergent type and dose before repeating the diagnosis.
8. Stop when the remaining possibilities require cabinet removal, live powered observation, internal electrical testing, a tub/bearing repair or water close to exposed electrical components.
Common mistakes that make leak diagnosis harder
- Ordering a drain pump because the puddle is near the front bottom, without checking whether the detergent drawer above it is overflowing.
- Replacing the door seal without checking the door glass, trapped hair or a wet trail from the dispenser.
- Tightening an inlet fitting with tools until the plastic thread or rubber washer is damaged.
- Running repeated full cycles to “see if it gets worse”. A leak is evidence, not a stress test.
- Removing panels and then running the machine live. That turns a water problem into an electrical and moving-parts risk.
- Assuming a spin-only leak must be bearings. Drain timing, residual water, the door seal and internal hoses deserve attention first.
- Ignoring the household drain. A blocked standpipe can overflow exactly when the washer pumps out and make a healthy machine look faulty.
When to stop and book a repair
DIY-safe troubleshooting should end once the leak is no longer external or owner-serviceable. Arrange manufacturer or qualified appliance service when:
- water is coming from inside the cabinet and you cannot identify an external hose or filter-cap cause
- the inlet valve appears to be leaking internally
- the door seal is torn and replacement requires spring clamps or substantial disassembly beyond the owner procedure
- the pump housing or an internal hose is cracked
- the machine leaks from the tub/bearing area, especially with rumbling, grinding or obvious drum play
- the washer overfills or keeps admitting water when it should stop
- the leak is near wiring, the motor or control electronics
- the machine trips a breaker, GFCI or RCD, smells hot, or shows burning/scorching
- the machine is under warranty and the next step requires removing panels.
When you book service, describe the evidence rather than guessing the part. “It stays dry during fill and wash, then leaks from the front-left base as soon as the drain pump starts” is far more useful than “the pump is bad”. Include the full model number, any error code, whether water remains in the drum, and what changed recently.
Frequently asked questions
Why is my washing machine leaking from the bottom?
Because water travels. Start by checking the inlet connections, detergent drawer, door seal, drain hose and household standpipe above and behind the puddle. If those stay dry and the leak begins during draining, the pump/filter housing or an internal drain hose becomes more likely. If it appears from the centre only during spin with rumbling or drum play, stop and have the tub/bearing area inspected.
Why does my washing machine leak only during the spin cycle?
First confirm it drained fully. A partial drain restriction can leave excess water before spin. Then note whether the leak actually starts when the drain pump runs, whether the front door seal leaks only at speed, and whether severe vibration is pulling on an internal hose. A tub seal or bearing-area fault is possible, but it should not be the first assumption.
Can a blocked drain filter cause a leak?
Yes, but there are two different mechanisms. A badly blocked filter can contribute to poor drainage and abnormal water behaviour, while a filter cap that is dirty, damaged or not fully refitted can leak directly. Whirlpool, LG and Electrolux all direct owners to the pump-filter area as part of leak troubleshooting on models that provide an owner-accessible filter.
Can too much detergent really make a washing machine leak?
Yes. Excess suds can overflow through the dispenser or force foamy water into places that normally remain dry. The clue is visible foam or a leak that began after changing detergent, dose or water conditions. Correct the detergent issue before ordering seals or pumps.
Why is my washing machine leaking from the detergent drawer?
Residue, limescale, a blocked dispenser path, an incorrectly positioned insert, excess detergent or an object in the drawer can stop water flowing cleanly into the drum. Clean the drawer and approved removable parts, confirm the detergent setup, and stop if the machine is genuinely overfilling rather than simply overflowing the drawer.
Is a small washing machine leak normal?
No. Condensation or a few drops left from disconnecting a hose are different, but a repeatable fresh leak during normal operation should be investigated. Small leaks can damage flooring and can become electrical hazards if water reaches components.
Can I keep using the washing machine if the leak is only small?
It is better not to normalise a repeatable leak. Identify and correct an obvious external cause first. If the source is unknown or internal, stop using the machine until it is repaired. Water can travel farther inside the cabinet than the small puddle outside suggests.
The bottom line
A washing machine leak becomes much easier to diagnose when you stop asking only where the puddle is and start asking when the first fresh water appears. Idle leaks point towards the supply side. Fill-stage leaks point towards inlet connections, the dispenser path or overfilling. Door leaks need the seal, glass, trapped items and loading checked. Drain-stage leaks shift attention to the drain hose, household drain, filter housing and pump path. Spin-only leaks need the drain result, seal, vibration and deeper tub system considered in that order.
The goal is not to name an expensive part quickly. Rule out the cheap, visible and safe causes first, then stop before leak tracing requires live electrics or major disassembly. If water will not leave the drum, work through the drainage checks. If the drum will not reach normal spin speed, diagnose the spin problem separately. Either fault can happen alongside a leak and may need its own fix.
Different symptom, or not sure which path fits? Use the FixDecoded Fault Finder to narrow the problem by what the machine is actually doing.
Sources
- Whirlpool – Reasons Why Your Washing Machine Is Leaking
- Whirlpool – How to Fix a Washing Machine
- LG USA – Front Load Washing Machine: Troubleshooting Leaks
- LG UK – Washing Machine Leakage Support
- Samsung UK – Washing Machine Fill and Drain Guidance
- Samsung US – Bespoke AI Laundry Combo Is Leaking Water
- Electrolux UK – Washing Machine Leaking Water: Causes and Solutions
- AEG UK – Washing Machine Inlet Hose Leaking
- Beko UK – My Washing Machine Is Leaking Water
- Beko UK – How to Fit a Washing Machine
- Bosch UK – Washing Machine Support
- Maytag – How to Fix a Leaking Washing Machine