
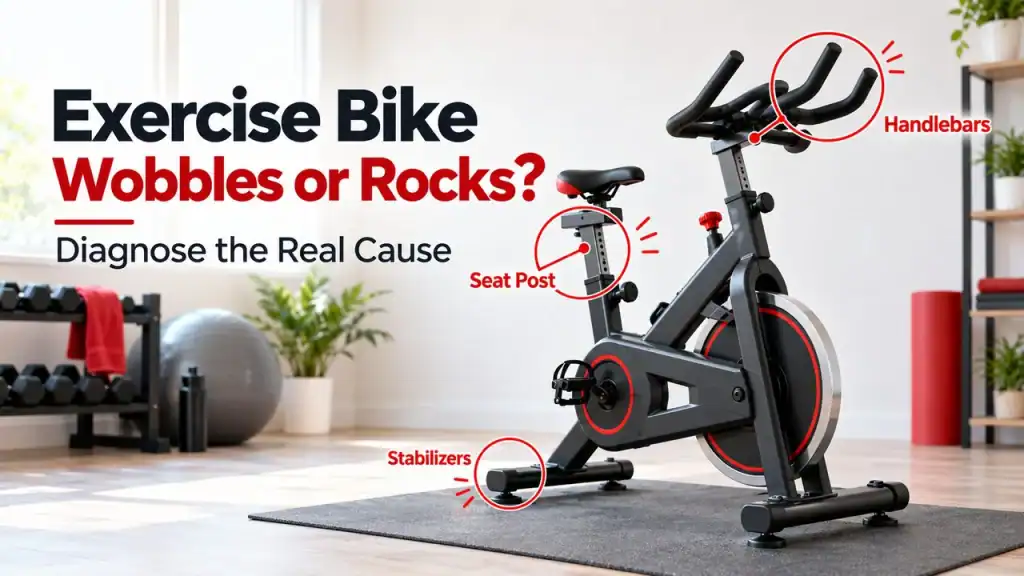
An exercise bike can wobble in several completely different ways. The whole machine may rock from one corner to another. The feet may stay planted while the frame shifts. The saddle may move inside an otherwise solid bike. The handlebars or screen may shake only when cadence rises. From the rider’s point of view, all of those can feel like the same fault: the exercise bike wobbles.
They are not the same problem, and that is why random tightening often gets people nowhere. Adjusting the levelling feet will not fix a loose seat post. Tightening the handlebar clamp will not correct a soft floor. Adding resistance may reduce rider sway, but it should never be used to hide a mechanically unstable frame.
The useful question is simple: where does the movement begin? Once you can answer that, most stability complaints become much easier to narrow down without dismantling the bike or replacing parts that were never faulty.
Quick answer: With the bike stationary and no rider on it, gently rock the main frame and watch the feet. If one foot lifts, start with the floor and levellers. If every foot stays planted but a stabiliser joint moves, inspect the frame-to-stabiliser hardware. If the base is solid and only the saddle, handlebar post or screen moves, diagnose that assembly separately. If the bike is stable when empty and sway appears only at high cadence or while standing, rule out mechanical play first, then look at bike fit and rider movement.
In this guide 20 sections
First, decide what is actually wobbling
Do not troubleshoot from the handlebars alone. A tall post and screen can amplify a small movement lower down, so a shake that feels dramatic at eye level may begin at one levelling foot. The reverse is also possible: the floor contact can be perfect while an adjustment post moves inside the frame.
| What moves | What it suggests first | Start here |
| Entire bike rocks diagonally | One contact point is carrying less load | Floor, levelling feet and stabiliser contact |
| Front or rear crossbar shifts | Stabiliser hardware or assembly joint | Frame-to-stabiliser fasteners |
| Feet stay planted but upper frame sways | Post, joint, structural movement or rider input | Find the first joint that moves |
| Seat moves but frame stays still | Saddle clamp, slider, seat post or locking mechanism | Isolate each seat adjustment point |
| Handlebars move but base stays solid | Handlebar slider/post or clamp | Check the post and slider separately |
| Only the screen shakes | Monitor mount or pivot, or amplified frame movement | Hold the bar/post and test the screen mount |
| Stable empty, sways only while riding | Rider movement, fit, cadence or load may contribute | Prove the bike is mechanically stable first |
| Wobble comes with crank or pedal play | Pedal/crank/drivetrain fault | Use the pedal-slip guide, not a levelling fix |
A 60-second stability test before you reach for a spanner
Do this with the bike fully assembled, switched off or unplugged where applicable, and nobody on it. If the machine already has a cracked part, visibly loose crank, damaged post or severe structural movement, skip the test and stop using it.
1. Place the bike where it is normally used. Moving it to another part of the room can change the result.
2. Stand beside the main frame and push it gently from one upper corner, then the other. Do not use the screen as a handle.
3. Watch each foot where it meets the floor. You are looking for lifting, sliding or a foot that does not seem to carry load.
4. Repeat the movement while watching the front and rear stabiliser joints. The question is whether the frame and stabiliser move together as one rigid assembly.
5. Hold the frame still and gently test the saddle. Then test the handlebar assembly. Finally test the screen mount separately if it has its own pivot or arm.
6. If everything is solid while stationary, do a cautious seated ride at an easy cadence. Only then compare what changes as cadence or effort rises.
A thin piece of paper can also be a useful clue on a hard floor. With the bike unloaded, see whether paper slides freely beneath one foot while the others grip the floor. It is only a quick contact check, not a substitute for the manufacturer’s levelling procedure.
If the whole bike rocks, start at the floor
Manufacturers consistently put floor contact near the beginning of stability troubleshooting. Peloton tells Bike+ owners to turn the outer feet beneath the stabilisers until they rest firmly on the floor, then gently rock the bike to confirm that it is stable. Bowflex tells C6 owners to level the machine again after moving it and warns not to extend the levellers so far that they unscrew from the bike. Decathlon uses the same basic logic on several Domyos bikes: stable floor contact and correctly adjusted feet come before deeper fault finding.
A floor can look flat and still leave one foot unloaded
Tiles can vary slightly in height. Concrete can slope. Timber floors can flex. Thick carpet or foam tiles can compress more under one stabiliser than another. A bike may also sit partly on a mat edge or on a surface that changes once body weight is added.
This is why the useful test is not ‘does the floor look level?’ but ‘are all intended contact points carrying load when the bike is in its normal position?’ Correct the contact using the bike’s own levelling system first.
Soft mats can create a fault that disappears on a firm surface
Owner communities repeatedly describe bikes that feel stable on a hard floor but become vague or wobbly on thick foam gym tiles. That is anecdotal evidence, not a universal rule against mats. A good equipment mat can protect the floor and work perfectly well. The diagnostic point is simply that a compressible surface can move under load.
If the manufacturer allows it, a short test on a firm, suitable surface can tell you whether the mat or carpet is part of the problem. Do not keep changing levellers to compensate for a surface that compresses differently every time you mount the bike.
Do not chase perfect level before you achieve stable contact
A spirit level can help with setup, but the machine can appear visually level and still rock because one foot is barely loaded. Remove the rocking first. Then confirm the final setup using the manufacturer’s instructions.
Avoid permanent cardboard fixes
A temporary shim can prove that a low spot in the floor is responsible. Folded cardboard is not a great permanent support for repeatedly loaded fitness equipment because it compresses and can slide. If the built-in adjustment cannot safely compensate for the surface, move the bike or create a firm, suitable base rather than building a stack under one corner.
If all the feet stay planted, watch the stabiliser joints
Most upright bikes and indoor cycles use front and rear stabiliser bars attached to the main frame. Those joints carry repeated side-to-side load. Schwinn’s IC4 assembly instructions tell owners to secure the front and rear stabilisers fully, and to inspect the finished bike before use. Bowflex uses the same basic construction on the C6.
Have another adult gently rock the bike while you watch the connection between the stabiliser and frame. If the crossbar stays planted but the main frame shifts relative to it, you have found a more useful clue than ‘the bike rocks’.
- New bike: revisit the exact assembly step, including washers, spacers and stabiliser orientation.
- Recently moved bike: check the joints and levellers that may have been disturbed during transport.
- Older bike that developed movement gradually: inspect for loosening, deformation, damaged fasteners or a mounting hole that has started to wear.
- Do not assume more force is always the answer. Use the specified tool and torque where the manual provides one. Over-tightening can strip threads or distort brackets.
If the seat wobbles but the base is solid
Seat movement is often blamed on the frame because the saddle gives you a lot of leverage. Trace it from the top down: saddle, saddle clamp, fore-and-aft slider, seat post, then the post locking mechanism.
Start at the saddle clamp
If only the saddle rocks on its rails, the post may be perfectly secure. Check the clamp arrangement shown in your manual. Do not copy a torque value from another saddle or bike.
Then isolate the fore-and-aft slider
Many indoor cycles let the saddle slide forwards and backwards. A small amount of play here can feel much larger once your body weight is on the saddle. Make sure the adjustment handle is actually clamping the slider rather than merely sitting in what looks like a tight position.
Finally check the post and locking mechanism
Bowflex and Schwinn instructions are useful examples because they require the seat-post locking mechanism to engage correctly and the adjustment knob to be secured. If the pin is not fully engaged, the post can feel ‘tight’ but still move under load.
Do not raise the seat post above its marked stop or minimum-insertion limit. Schwinn specifically warns against setting the seat or handlebar post above the stop mark. If you need more height than the permitted range provides, that is a fit limitation, not a reason to reduce the amount of post supported inside the frame.
Community reports around Schwinn IC4/Bowflex C6 and other indoor cycles are useful here because riders often describe a seat that feels locked until they load it. Treat those reports as symptom patterns, not universal repair instructions. If the correct locking mechanism still allows obvious movement, especially on a new bike, use manufacturer support rather than packing the post with improvised material.
If the handlebars wobble but the bike does not
Handlebar movement follows the same logic. Hold the main frame or lower post steady and gently test the bar. Watch the horizontal slider, the vertical post and the clamp or adjustment handle one at a time.
- Confirm the handlebar post is below its stop mark.
- Make sure the adjustment pin or handle is actually engaged in the intended hole or locking position.
- Check the fore-and-aft slider separately from the vertical post.
- Compare visible washers, spacers and fasteners with the assembly manual if the problem has existed since day one.
- If a rigid joint moves even after correct assembly, stop adding force and contact support.
Owner discussions show why this separation matters. Some riders reporting a ‘wobbly bike’ eventually find an upper-post or handlebar-sleeve problem while the base is stable. That is very different from a levelling fault, even though both are felt through the hands.
If only the screen shakes
Large screens amplify movement. A touchscreen can look dramatic while the handlebar post underneath it is reasonably solid. Peloton’s Bike+ setup, for example, has separate monitor mounting bolts as well as separate stabiliser adjustment. Other bikes use pivots or monitor arms.
Hold the handlebar or post still and test the screen mount separately with the bike stationary. If the movement begins at the display hinge, pivot or mounting bolts, do not compensate by over-tightening unrelated frame hardware lower down.
The bike is stable when empty but sways when you pedal
This is where stability diagnosis becomes more subtle. A tall indoor cycle is not an immovable block. Alternating pedal force and upper-body movement can create visible sway, especially during standing efforts or very high cadence. Community discussions repeatedly show riders struggling to distinguish normal rider-induced movement from a genuine loose joint.
Mechanical checks still come first. If a foot lifts, a stabiliser moves, a post has play or a rigid joint opens and closes, do not explain it away as technique. But if the machine is solid when stationary, all feet remain planted and no joint has independent movement, look at when the sway appears.
| More consistent with rider/fit influence | More consistent with a mechanical stability fault |
| Stable when empty | A foot lifts or slides |
| No joint has visible play | A stabiliser shifts relative to the frame |
| All feet stay planted | Seat or handlebar post moves in its clamp |
| Movement rises smoothly with cadence or standing effort | A new clunk appears as the frame changes direction |
| Movement reduces when pedalling becomes smoother | Movement appeared suddenly after previously stable use |
Bike fit can contribute too. A saddle that is too high can make the hips rock side to side as the rider reaches for the bottom of the pedal stroke. Excessive reaching to the handlebars can also encourage upper-body movement. Adjust fit only after the bike itself has passed the mechanical stability checks.
Do not use extra resistance as a ‘fix’ for a mechanically unstable bike. A little more load may change how a rider moves, but it cannot repair a loose stabiliser, damaged post or poorly supported foot.
If the wobble started after moving the bike
Timing is strong evidence. A bike that was stable for months and starts rocking immediately after being moved probably deserves a setup audit before a structural diagnosis.
- The new part of the floor may be less even.
- A mat may have folded, shifted or compressed differently.
- Levelling feet may have turned during transport.
- A stabiliser joint may have been loaded or loosened while the bike was lifted.
- The seat or handlebar may have been lowered or removed and not fully locked again.
- A monitor or accessory mount may have been disturbed.
- Transport wheels or end caps may have been damaged or may no longer sit as designed.
Bowflex explicitly tells C6 owners to level the machine after moving it to a new location. That is a good general diagnostic principle even though the exact leveller design varies by model.
If the bike has wobbled since the day it was assembled
A bike that has never been stable should be treated as an assembly or product-support problem before it is treated as normal wear. Work through the assembly sequence in order rather than tightening random parts.
1. Confirm the front and rear stabilisers are fitted in the correct position and orientation.
2. Check that every specified bolt, washer and spacer is present.
3. Confirm shipping pieces that the manual says to remove were actually removed.
4. Set the levellers with the bike in its permanent location.
5. Check seat-post and handlebar-post locking mechanisms and stop marks.
6. Inspect any monitor or tablet mount separately from the bar assembly.
7. If the machine still has visible movement at a rigid joint, document it and contact the retailer or manufacturer while the return or warranty window is still open.
Recumbent bikes need one extra distinction
On a recumbent exercise bike, a moving seat carriage or backrest can make the entire machine feel unstable even when the base is planted firmly. Have someone watch the feet while you gently load the seat. If the base stays still but the seat rail, carriage or backrest shifts, follow the model’s seat-locking or rail procedure rather than adjusting the levellers again.
What about maximum user weight?
Check the maximum user weight in the manual or product documentation and do not exceed it. The limit is part of the machine’s structural specification, not a tuning suggestion. At the same time, do not assume that a rider within the stated limit is ‘too light’ or ‘too heavy’ simply because the bike wobbles. A correctly assembled bike on a suitable surface should first be assessed for floor contact, hardware and adjustment play.
Repeatedly loose hardware is a clue, not a maintenance routine
If the same bolt or adjustment point keeps working loose, take that seriously. Correctly assembled hardware should not need aggressive re-tightening before every ride.
Repeated loosening can point to incorrect assembly, damaged threads, missing locking hardware, worn mating surfaces or a joint that is moving more than intended. Community forums often recommend threadlocker, but do not apply it automatically. The type of fastener, material, service procedure and warranty can matter. Use it only where the manufacturer permits it.
When a wobble becomes a stop-use problem
A small levelling adjustment is routine. Movement at a load-bearing joint is different. Stop riding and arrange inspection when:
- a stabiliser bolt or mounting point visibly moves under load
- a levelling foot is broken, missing or cannot be adjusted securely
- the seat or handlebar post cannot be positively locked
- the bike lifts a foot noticeably during normal seated riding
- a crank arm or pedal has physical play
- a weld, frame tube or mounting plate is cracked, bent or separating
- a bolt hole looks elongated or deformed
- movement is rapidly worsening
- wobble is accompanied by severe grinding, knocking or loss of drive
- the next useful check requires defeating a guard or working near exposed moving parts
If the bike is under warranty, photograph or video the movement before modifying the part. A short video filmed low enough to show the feet, stabilisers and moving joint is usually more useful to support than a close-up of a shaking screen.
A troubleshooting order that wastes the least time
1. Test the bike empty. If it rocks, watch the feet.
2. If a foot lifts, correct floor contact and levelling first.
3. If the feet stay planted, watch the stabiliser-to-frame joints.
4. If the base is rigid, test the saddle, slider and seat post separately.
5. Test the handlebar slider, post and screen mount separately.
6. Only after the stationary checks pass, compare seated easy pedalling with higher cadence or standing effort.
7. If movement is rider-dependent, review fit and technique without using them to excuse mechanical play.
8. Stop when movement comes from a rigid structural or crank joint that should not move.
Maintenance that helps keep the bike stable
The exact schedule belongs to the manufacturer, but stability is worth checking periodically because the same joints are loaded thousands of times during normal use. A sensible routine is simple:
- Wipe sweat from the frame and adjustment areas after use.
- Check that the bike still sits firmly on the floor after it has been moved or the room has been rearranged.
- Inspect levelling feet and end caps for damage.
- Check accessible stabiliser hardware at the interval stated in the manual.
- Keep seat and handlebar adjustment mechanisms clean and make sure pins fully engage.
- Stay below seat and handlebar stop marks.
- Investigate new movement instead of getting used to it.
Frequently asked questions
Why does my exercise bike wobble even though the floor looks level?
A floor can look flat while one levelling foot carries less load, or a mat or carpet can compress unevenly. Watch each foot while gently rocking the bike and use the model’s levelling procedure. Stable contact matters more than appearance alone.
Why does my stationary bike wobble only at high cadence?
If the bike is stable when empty, all feet stay planted and no joint has play, high cadence can amplify rider movement. Check fit and pedalling smoothness. If a foot lifts, a joint shifts or a new clunk appears, treat it as a mechanical stability fault instead.
Why does my spin bike wobble when I stand up?
Standing increases alternating load through the pedals, frame and handlebars. Recheck floor contact, stabiliser joints, handlebar locking points and pedal/crank security. Do not keep reproducing a visible loose joint under full body weight.
Why is my exercise bike seat wobbly?
Trace the movement from the saddle down. The saddle clamp, fore-and-aft slider, seat post and post locking mechanism can each create similar symptoms. The first joint that moves independently is the one to diagnose.
Why do my exercise bike handlebars wobble?
If the base remains solid, inspect the handlebar slider, vertical post and locking mechanism separately. Compare the assembly with your manual and make sure the post is below its stop mark. If a rigid joint still moves after correct setup, contact support rather than adding more force.
Can I put plywood or a board under an exercise bike on carpet?
A firm base can sometimes reduce movement caused by very soft flooring, and owners commonly report using one successfully. Treat that as a surface solution, not a repair for loose hardware. It must be stable, suitably sized, non-slip and compatible with the flooring and the bike manufacturer’s setup guidance.
Can I use cardboard or a small shim under one foot?
A temporary shim can confirm that an uneven surface is involved, but soft cardboard compresses and can slide. Use the built-in levellers first. For a permanent floor solution, use a firm, stable method that does not create a new tipping or slipping risk.
Should I use threadlocker on bolts that keep coming loose?
Only if the manufacturer or service procedure permits it. Repeated loosening can indicate damaged threads, missing hardware or unwanted movement at the joint. Threadlocker should not be used to hide the reason a structural fastener will not stay secure.
Is a little frame movement normal on an exercise bike?
Some upper-frame or screen movement can be visible during hard riding, especially on tall indoor cycles, but there is no universal acceptable amount across all designs. Feet lifting, rigid joints moving, new clunks or rapidly increasing movement are stronger warning signs than the screen moving slightly during a sprint.
My new exercise bike wobbles. Should I return it?
First complete the manufacturer’s levelling and assembly checks while the return or warranty window is open. If all intended contact points are stable and a rigid joint or post still has excessive play, document the movement and contact the retailer or manufacturer before modifying the machine.
The bottom line
A wobbly exercise bike is not a diagnosis. It is a description of movement. The fastest route to the cause is to stop treating the bike as one object and watch where that movement begins.
If a foot lifts, start with the floor and levellers. If the feet stay planted but a stabiliser shifts, inspect its mounting. If the base is solid but the saddle or handlebars move, isolate the relevant adjustment point. If everything is mechanically secure and sway appears only with cadence or standing effort, then rider movement and bike fit become useful variables.
Most importantly, do not normalise new movement in a load-bearing joint. A small levelling correction is easy. A stabiliser, post, pedal or frame connection that has been moving under load for months can become a much more expensive problem.
Related FixDecoded guides
- Exercise Bike Troubleshooting: Diagnose Resistance, Console, Pedal and Noise Problems – Use the cornerstone if the bike has several symptoms or you are not yet sure which system is at fault.
- Exercise Bike Pedals Slipping or Skipping? Diagnose Pedal, Crank and Drive Problems – Use this when the movement is actually at a pedal, crank or drive connection.
- Exercise Bike Making Noise? Diagnose Clicking, Squeaking, Grinding and Knocking – Use this when sound is the primary symptom and the machine itself is stable.
- Exercise Bike Resistance Not Working? Diagnose the Cause Before Replacing Parts – Use this when the bike feels too easy, too hard or resistance does not follow the control.
- Exercise Bike Console Not Working? Diagnose a Blank, Frozen or Stuck Display – Use this when the display, power, RPM or workout data is the real fault.
- FixDecoded Fault Finder – Use the interactive tool when the symptom does not fit one guide cleanly.
Sources and further reading
Manufacturer documentation was used for setup, levelling, locking and safety guidance. Community sources were used only to identify recurring real-world symptom patterns, not as the sole authority for repair instructions.
- Peloton: Setting up your new Bike+ – Current setup guidance covering outer stabiliser feet, confirming the bike does not wobble, moving the bike and touchscreen mounting.
- Schwinn: IC4 Bike Assembly – Official assembly guidance covering front/rear stabilisers, seat and handlebar post locking, stop marks and final fastener inspection.
- Bowflex: C6 Bike Assembly – Official assembly and levelling guidance, including stabiliser hardware, post locking, moving the machine and leveller adjustment limits.
- Bowflex/Schwinn IC4/C6 Service Manual – Manufacturer service documentation identifying stabilisers, levelers, seat/handlebar adjustment hardware and related components.
- Decathlon UK: Initial Bike support – Official support guidance separating stability, foot-cap adjustment and handlebar/saddle clamping checks.
- Decathlon UK: Domyos Challenge support – Official support guidance for an unstable bike, adjustable legs and correctly tightened handlebar/saddle clamping levers.
- Decathlon UK: EB 520 support – Official troubleshooting guidance for exercise-bike stability, visible hardware and rear-foot adjustment.
- Reddit /r/pelotoncycle: Disappointed in Quality of Bike – Community pattern check showing how owners distinguish stabiliser, floor, handlebar/screen and high-cadence movement. Used as anecdotal symptom context only.
- Reddit /r/pelotoncycle: New cross training bike stability – Recent owner discussion illustrating screen/post movement and the difference between display shake and whole-bike instability. Used as anecdotal context only.