
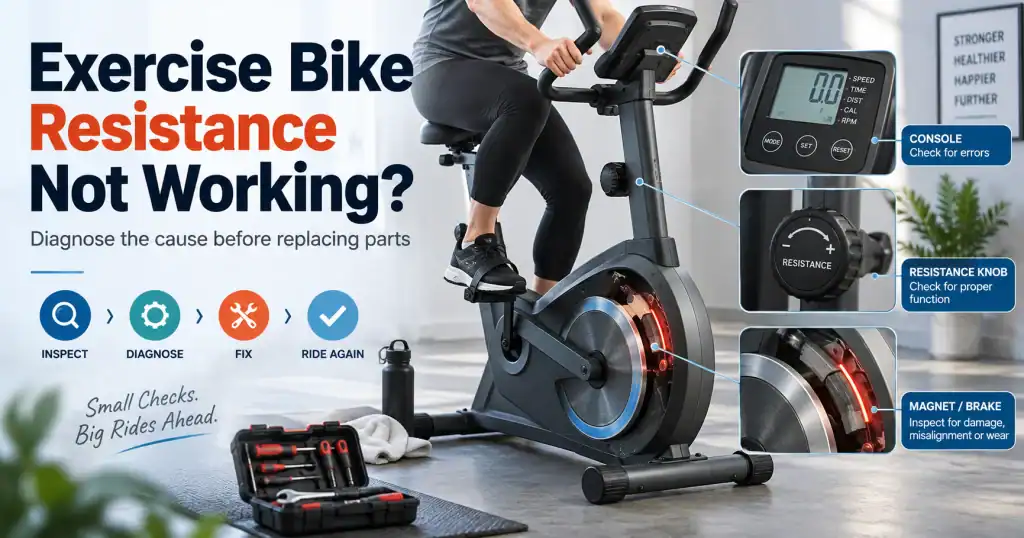
An exercise bike can tell you that the resistance has changed without actually making the pedals any harder.
It can also do the opposite. You turn the knob, feel a clear increase in workload, but the number on the console barely moves. Another bike may stay painfully heavy at its lowest setting, while one that worked yesterday suddenly feels as if the flywheel has no resistance at all.
All four situations are commonly described as exercise bike resistance not working. They are not the same fault.
The useful question is not simply whether the resistance works. It is which part of the command is still working.
Does the knob physically move? Does the resistance number change? Can you hear a motor respond? Does the pedal load change? Did the fault start after assembly, moving the bike, a power interruption or a repair?
Those observations can separate a simple set-up problem from a cable, control, actuator, calibration or braking fault before you start buying parts.
Quick answer: If your exercise bike resistance is not changing, first establish whether the problem is with the physical pedal load or only the displayed resistance level. Then identify whether your bike uses manual magnetic, electronically controlled magnetic, friction, electromagnetic or air resistance. Check the external controls, power supply, programme mode, accessible connections and anything disturbed during recent assembly or moving. Do not remove powered covers or recalibrate the bike using instructions from another model.
In this guide 21 sections
“Resistance not working” needs a more precise description
Before touching anything, change the wording of the problem.
A bike that stays on minimum resistance needs a different diagnosis from one that is permanently difficult to pedal. A console that displays level 20 while the pedals feel exactly as they did at level 1 presents a different clue again.
Use what the machine is doing now:
| What you observe | What it suggests first |
| Resistance number changes, pedal load does not | The command is being registered, but the resistance mechanism may not be following it. |
| Pedal load changes, displayed level does not | Physical resistance may be working. Readout, position sensing or calibration becomes more relevant. |
| Knob turns but nothing changes | Mechanical linkage, cable, threaded adjuster, brake or magnet movement needs attention. |
| Resistance is permanently very light | The brake or magnet mechanism may not be moving into its working range. |
| Resistance is permanently very heavy | The brake may be engaged, the mechanism may be stuck, actuator position may be wrong or calibration may be incorrect. |
| Resistance changes by itself | Programme behaviour, power, connections, control electronics or position feedback may be involved. |
| Problem started immediately after assembly | Recheck assembly and resistance-control connections before assuming component failure. |
| Problem started after moving the bike | Look first at connectors, cables, adaptor and anything disconnected or disturbed. |
| Resistance works manually but not automatically | On a bike with auto-resistance, concentrate on the automatic command path rather than the basic braking mechanism. |
| Pedals speed up but the flywheel does not follow under force | This may be drivetrain slip rather than a resistance-control fault. |
This distinction is where generic troubleshooting often goes wrong. A list of replacement parts is not much use until you know what the bike is actually failing to do.
First work out what kind of resistance system you have
The shape of the bike does not tell you enough.
Two upright bikes can use completely different resistance systems. The same is true of indoor cycling and recumbent bikes. More importantly, magnetic does not automatically mean electronically controlled.
Some magnetic bikes use permanent magnets whose position is changed directly by a knob, lever, cable or mechanical adjuster. Others use a motor or actuator to move a magnetic brake after receiving a command from the console. More sophisticated equipment may vary an electromagnetic field electronically instead of mechanically moving permanent magnets.
Bowflex’s C6 is a useful example of why the distinction matters. Its documentation describes a physical resistance adjustment knob that the rider turns clockwise or anticlockwise to change workload. The console can display the resistance level, but that does not make the basic adjustment mechanism equivalent to a console-controlled resistance motor.
Friction bikes are different again. They create resistance by pressing a pad or brake surface against the flywheel. Air bikes principally use increasing aerodynamic drag from the fan, so harder and faster pedalling naturally creates more resistance.
If you do not yet know which system your bike uses, find the exact model number and check its owner documentation before opening anything.
Before diagnosing the bike, make sure it is actually misbehaving
Not every resistance change is a fault.
Some exercise bikes alter resistance automatically during preset workouts. Horizon specifically advises checking which programme is running when resistance appears to change unexpectedly. It also recommends confirming the correct power supply when resistance is too hard, too weak, erratic or does not change.
That gives you two worthwhile checks before assuming hardware failure.
First, switch to a normal manual workout mode if your model offers one. Set the resistance low, pedal steadily, increase it substantially and compare the physical workload.
Second, confirm that the bike is using the power source specified by the manufacturer. Do not assume an adaptor is suitable because the plug fits. Voltage, polarity and current requirements matter.
If the bike is self-powered, the diagnostic process can be different again because pedalling may be required to energise its console and resistance electronics.
If the bike is new and the resistance has never worked properly
A resistance fault that has existed since assembly deserves a different starting point from one that appeared after two years of normal use.
Do not immediately assume a defective magnet, motor or control board.
Assembly can affect the resistance mechanism directly. Decathlon’s support information for the Domyos EB 120, for example, tells owners with a resistance problem to check whether an assembly block was removed and then verify the resistance-cable installation. Its Initial Bike documentation similarly tells owners to confirm removal of a spacer when resistance does not vary.
Those are model-specific instructions, not universal procedures. The broader lesson is valuable, though: if the bike has never had working resistance, inspect what was assembled before diagnosing what has supposedly failed.
A cable can be connected incorrectly. A connector may not be fully seated. Packaging hardware can remain in place. A control cable can be routed incorrectly. A plug can appear connected while one pin is bent or pushed back.
This is particularly important if the console, handlebar mast or front frame had to be connected during assembly.
Manual magnetic resistance: when the knob turns but the workload does not change
A manual magnetic system normally changes the relationship between a permanent magnet assembly and the flywheel.
Depending on the design, the resistance knob may operate a cable, threaded mechanism, lever or other linkage. Turning the knob therefore tells you only that the control itself moves. It does not prove that the mechanism at the other end is travelling with it.
A useful test is to feel the resistance across a meaningful range rather than making tiny adjustments. Start where the manufacturer considers the low end of normal operation, pedal steadily, then move towards a substantially higher setting.
If the knob moves through its expected travel but pedal load remains unchanged, think along the mechanical path between the control and magnet assembly.
A fault immediately following assembly makes incorrect cable engagement or routing particularly interesting. A sudden fault after months of normal use makes a disconnected, slipping, damaged or jammed part of the mechanism more plausible.
Do not keep winding a resistance knob beyond its designed travel in an attempt to catch the mechanism. Bowflex specifically warns on the C6 that turning its resistance adjustment beyond its intended range can damage the machine. That is another reason to avoid universal advice such as keep tightening until you feel resistance.
When the resistance changes physically but the number on screen does not
This is easily mistaken for a resistance failure.
Suppose you turn the knob and the bike clearly becomes harder to pedal. The resistance mechanism has responded to something. If the displayed value remains frozen, jumps unpredictably or bears little relationship to the actual workload, replacing the brake assembly would be a poor first conclusion.
You now have two separate observations: physical resistance changes, but reported resistance does not follow it correctly.
That moves attention towards whatever your particular model uses to sense, calculate or report resistance position.
Calibration may eventually be relevant on certain machines, but only after confirming that your model actually uses a calibration procedure for that problem.
The practical point is simple: a wrong number on the display is not the same fault as a flywheel that has lost its braking resistance.
Electronic magnetic resistance: watch the command chain
Electronically controlled magnetic bikes add several stages between you pressing a button and the pedals becoming harder.
The console first has to recognise the request. That command then has to travel through the bike’s wiring and control system. A resistance motor or actuator may have to move a magnet assembly. Some designs also need positional information so the machine knows where that mechanism is.
That creates one of the most useful resistance symptoms: the displayed level changes, but the pedal load stays the same.
If you press resistance up and the display moves from 3 to 12, the console has at least acknowledged your input. That does not prove the signal reached the actuator or that the brake mechanism moved, but it tells you more than a completely unresponsive control does.
If the level will not change on screen either, start higher in the chain. Control input, console power, connectors and communications become more relevant before you assume the resistance motor itself has failed.
Decathlon’s EB 520 documentation provides a real manufacturer example. When that model produces certain resistance-related error codes or resistance does not vary, Decathlon directs the owner to check connections behind the console and under the stem, including fully seated connectors, damaged cables and connector-pin alignment.
The EB SEAT uses a motor-managed resistance system and its support material similarly associates E2/E3 behaviour and unchanged resistance with cable and connector checks.
That is much stronger evidence than declaring that no resistance automatically means a bad resistance motor.
Listen, but do not diagnose from sound alone
On a motor-controlled system, a change in sound when you request a different resistance level can be useful.
If you normally hear a brief actuator movement and it disappears when the fault begins, note that. If a motor can clearly be heard operating but pedal load does not change, the mechanical portion of the resistance assembly becomes more interesting.
But sound is only supporting evidence. A quiet bike does not automatically have a failed motor, and an audible motor does not prove the magnet or brake assembly has reached the correct position.
The observation becomes useful when combined with the display and pedal feel. A displayed command, an actuator response and no workload change together tell you far more than an uncertain motor noise on its own.
When the bike is stuck at very high resistance
A bike that suddenly becomes extremely difficult to pedal should not be forced.
Start with the control position and the bike’s recent history.
Was the flywheel locked for storage? Was the emergency brake used? Did someone turn the resistance control fully before moving the bike?
On the Bowflex C6, for example, the resistance control is also used to lock the flywheel for storage. Bowflex warns not to operate the machine with resistance outside its normal displayed operating range.
That procedure is specific to that bike, but it demonstrates an easily missed diagnostic question: is the bike broken, or has its braking mechanism simply been left in a storage or stop position?
If the control is correctly set at minimum and the flywheel remains unusually hard to turn, stop applying more force. A stuck braking mechanism, actuator position, internal interference or mechanical fault can turn a resistance complaint into damaged drivetrain components if you try to overpower it.
When the bike is permanently too easy
At the other end of the range, a bike may pedal almost freely even when resistance is supposedly at maximum.
On a manual magnetic bike, check whether the control is actually moving through its normal range. If the failure began after assembly, pay particular attention to the control mechanism and cable or linkage where the manufacturer’s instructions make those accessible.
On an electronic bike, compare what the console reports with what you physically feel. A level that rises normally on screen while the pedals remain light is more consistent with a failure farther down the resistance-control chain than with an ignored button press.
On a friction bike, physical contact matters. If the adjustment control moves but the brake surface no longer applies the expected pressure to the flywheel, software troubleshooting will achieve nothing.
Do not spray lubricant around the brake or flywheel in an attempt to make the mechanism move more freely. A lubricant that reaches a friction surface can make the original resistance problem worse. Use only maintenance products and locations specified for your exact bike.
Friction resistance behaves differently
Friction resistance is mechanically simpler, but that does not make every repair universal.
Turning the resistance control should alter the force applied by a pad or brake surface against the flywheel. As the contact material wears, changes shape or stops reaching the flywheel correctly, the usable resistance range can change.
The symptom can be subtle at first. Maximum resistance may feel weaker than it used to. More knob travel may be required for the same workload. The braking feel can become inconsistent.
A resistance knob that suddenly spins with very little effect may indicate a problem in the adjustment mechanism rather than the flywheel itself.
Before adjusting or replacing a pad, consult the manufacturer’s procedure. Pad material, alignment, adjustment method and acceptable wear vary between bikes.
Also remember that many indoor cycling bikes use their resistance control as an emergency brake. A fault affecting that system is not merely an inconvenience. If the bike cannot provide predictable braking or emergency stopping, it should not be used until it is repaired.
If automatic resistance fails but manual resistance still works
Connected exercise bikes introduce another useful comparison.
Some machines provide both manual adjustment and automatic resistance controlled by workout software. Peloton’s Bike+, for example, supports both manual resistance and an auto-resistance feature that follows instructor cues.
If the bike responds normally when you change resistance manually but fails only when automatic adjustment is enabled, the basic resistance mechanism has just demonstrated that it can change load.
That does not prove every piece of hardware is perfect, but it changes the diagnostic direction considerably. Workout mode, software state, connectivity, automatic-control commands or the parts unique to automatic adjustment become more relevant.
The reverse is also valuable. If neither manual nor automatic control can alter pedal load, the common physical resistance path deserves more attention.
This is why restart the app should not be the first answer to every smart-bike resistance problem. First establish whether the failure is automatic only or affects resistance regardless of how it is commanded.
Erratic resistance is often more informative than no resistance
A bike that sometimes responds correctly and sometimes does not is frustrating, but intermittency provides clues.
Notice what coincides with the change.
Does resistance jump when the handlebar mast moves slightly? Does it become erratic only in a programmed workout? Does the display flicker? Did it begin after the bike was moved? Does the selected level remain stable while physical resistance changes underneath you?
Manufacturer guidance gives us several legitimate directions here. Horizon advises verifying the correct power supply and the active workout programme when resistance is erratic. Decathlon directs owners of affected electronically controlled models towards connectors, damaged cables and misaligned connector pins.
That does not mean every intermittent fault is wiring. It means the failure should be reproduced and observed before a part is blamed.
A connector that makes and breaks contact, an actuator that binds at part of its travel, a position-sensing problem and unstable power can all create very different patterns from a permanently failed component.
Write the pattern down. Resistance jumps between easy and hard every few minutes is more useful than resistance broken.
Do not confuse drivetrain slip with low resistance
This deserves its own check because the sensation can be deceptive.
You press harder on the pedals. Your legs accelerate suddenly. It feels as if the bike has lost resistance.
But ask what happened to the flywheel.
If the crank speeds up while the flywheel fails to follow proportionally, the resistance mechanism may not be the problem at all. A belt, chain, freewheel or another part of the drivetrain may be slipping.
The difference matters. A genuine loss of magnetic or friction resistance usually changes the load resisting the flywheel. Drivetrain slip interrupts the transfer of your pedal force to that flywheel.
If you can see the flywheel safely without approaching moving components, watch its behaviour. Do not remove covers and pedal a partly disassembled bike unless the manufacturer provides a specific service procedure and you are qualified to follow it.
For broader pedal, drivetrain, noise and console diagnosis, see Exercise Bike Troubleshooting: Diagnose Resistance, Console, Pedal and Noise Problems rather than turning this page into a second general bike guide.
Calibration is not a universal cure
This is one of the biggest weaknesses in exercise-bike advice online.
Recalibrate it sounds harmless. Sometimes it is exactly the right procedure. On another bike, calibration may require a particular starting position, service mode or specialist tool. On a model with a purely mechanical resistance system, the supposed calibration procedure may not even make sense.
Keiser provides an excellent example. Its official M3/M3i procedure states that calibration is required when the computer has been replaced or the magnet assembly has been disassembled, and the process uses a specific Keiser calibration tool.
Compare that with the Domyos EB SEAT. Decathlon has a completely different, model-specific procedure for a new unit showing an E2 fault related to resistance-motor calibration.
Both are legitimate manufacturer procedures. They are also completely different.
That is precisely why FixDecoded should never publish a generic sequence telling owners to hold a random combination of buttons and recalibrate an exercise bike.
If your owner’s or service manual gives a calibration process for your model and symptom, follow that process. If it does not, do not borrow one from a bike that happens to look similar.
Power cycling can be useful, but it is not diagnosis
A complete restart is reasonable on an electronically controlled bike when the manufacturer supports it or when you are trying to establish whether a software state is temporary.
What it should not become is the explanation.
If resistance returns after a restart but fails again, you have learned that the fault may be intermittent or related to electronic control state. You have not necessarily repaired the machine.
Likewise, an arbitrary rule such as unplug every magnetic bike for 60 seconds ignores manually controlled magnetic bikes that do not rely on mains power to create resistance at all.
Use a restart as an observation, not as a substitute for understanding the resistance system.
The safest order of checks
A good resistance diagnosis gets progressively more specific without getting progressively more reckless.
Start with the exact symptom and the model. Establish whether pedal load, displayed level or both are wrong. Identify the resistance system. Check the programme and external power arrangement where relevant. Revisit anything assembled or disturbed recently. Inspect only the accessible connections and controls the manufacturer expects the owner to inspect.
From there, the next step depends on what remains.
A manual magnetic bike may point towards its mechanical control path. An electronic bike may point towards its command, wiring or actuator chain. A friction bike may point towards its physical brake mechanism. A bike whose physical resistance changes correctly but whose number does not may instead have a sensing or calibration issue.
That is the point where a model-specific manual becomes more valuable than another generic troubleshooting article.
When to stop troubleshooting
Stop using the bike if resistance changes unpredictably enough to affect your balance, the emergency brake does not work as designed, the drivetrain binds, you smell overheating or burning, you see damaged wiring, a pedal or crank is loose, or the next diagnostic step requires powered testing inside the machine.
Disconnect powered equipment before manufacturer-approved service work. Bowflex’s C6 documentation, for example, specifically instructs users to disconnect power before servicing.
Also stop when you have narrowed the problem successfully but the remaining component belongs behind a guarded cover.
Knowing that the fault is probably between the resistance command and actuator is already useful. You do not have to energise an exposed motor with a multimeter to make the diagnosis worthwhile.
What your symptom tells a technician
If the problem survives the safe checks, resist the temptation to diagnose the part for the repairer.
The resistance motor is broken is a guess.
The display moves from level 1 to level 20, but pedal load never changes and I no longer hear the normal adjustment sound is evidence.
Likewise: the workload changes when I turn the knob, but the displayed resistance jumps from 12 to 28 without matching the physical change.
Or: the bike worked before I moved it. Since reconnecting the console mast, the resistance changes intermittently.
That information reduces diagnostic time because it describes where the system still works and where the expected response disappears.
Frequently asked questions
Why is my exercise bike resistance not working even though the number changes?
If the level changes on screen but physical pedal resistance does not, the console is at least registering your request. On an electronically controlled bike, the next stages can include wiring, the resistance actuator or motor, linkage, brake or magnet movement, position feedback and model-specific calibration. Manufacturer troubleshooting for electronically controlled Domyos bikes, for example, directs owners towards cable and connector checks when resistance does not vary.
Why does the resistance knob turn but nothing happens?
First identify the resistance design. On a manual magnetic or friction bike, the knob must mechanically influence the magnet or braking assembly through some form of adjuster, linkage or cable. If that connection no longer follows the knob, the control can turn without producing a meaningful change in load. A bike that has behaved this way since assembly should be checked against its assembly instructions before parts are replaced.
Why is my exercise bike stuck on high resistance?
Check whether the brake or resistance control has been left in a storage or emergency-stop position and whether the control actually returns to its normal low setting. Do not force the pedals if the flywheel remains abnormally difficult to move. Electronically controlled models can also become stuck because the resistance mechanism is positioned incorrectly, but diagnosis should follow the model-specific procedure.
Why is the bike stuck on low resistance?
On a mechanical system, the resistance control may not be moving the brake or magnet assembly through its normal range. On an electronic system, compare the displayed level with physical pedal load. If the display changes normally while workload stays light, investigate farther down the control chain rather than assuming the console ignored the input.
Can calibration fix exercise bike resistance?
Sometimes, but only when the manufacturer specifies calibration for the model and fault. Keiser, for example, limits its M3/M3i calibration procedure to specific circumstances and requires a calibration tool, while other manufacturers use entirely different procedures. There is no safe universal calibration sequence.
Why does my resistance change during a workout by itself?
Make sure the bike is not running a preset or automatic programme designed to alter resistance. Horizon specifically recommends checking the selected programme when resistance changes unexpectedly. If the bike is in manual mode and resistance still changes, power, connections, control electronics or the resistance mechanism may need further diagnosis.
Why does my air bike get harder when I pedal faster?
That is normally how an air-resistance bike works. Increasing fan speed increases aerodynamic drag, so resistance rises with effort rather than moving through conventional magnetic levels. If the bike suddenly becomes unusually easy despite the fan turning faster, investigate the drive and fan system rather than searching for a magnetic resistance control.
Should I lubricate the resistance mechanism?
Not unless the manufacturer identifies a specific lubrication point and product. Lubricant on a friction brake surface can reduce resistance, and lubricant in the wrong place can contaminate belts or attract dirt. Lubricate everything is not an appropriate troubleshooting method.
The bottom line
An exercise bike resistance problem becomes much easier to understand once you stop treating resistance as a single component.
There is a control. There may be a display. There is a mechanism that creates load. Electronic bikes can add wiring, a motor or actuator, position sensing and software between those stages. Mechanical bikes remove some of those layers but introduce their own cables, linkages, threaded adjusters and wear points.
The most useful diagnosis is therefore a comparison: what did you ask the bike to do, and how far through that chain did it actually respond?
If the display changes but the pedals do not, follow the resistance mechanism. If the pedals change but the number does not, question the readout rather than the braking force. If the bike has never worked since assembly, revisit assembly. If manual adjustment works but automatic control fails, separate the software-controlled path from the underlying resistance system.
And if the diagnosis reaches an internal powered component, a guarded flywheel assembly or a calibration procedure not documented for your model, that is the point to stop guessing.
The goal is not to replace the most likely-sounding part. It is to know why that part has become likely before you spend money on it.
Sources
• Horizon Fitness – How Do I Fix Incorrect Resistance on my Exercise Bikes or Indoor Cycle?
• Decathlon UK – Domyos EB 120 support
• Decathlon UK – Domyos EB 520 support
• Decathlon UK – Domyos EB SEAT support
• Bowflex C6 – Quick Start / Owner Guidance