
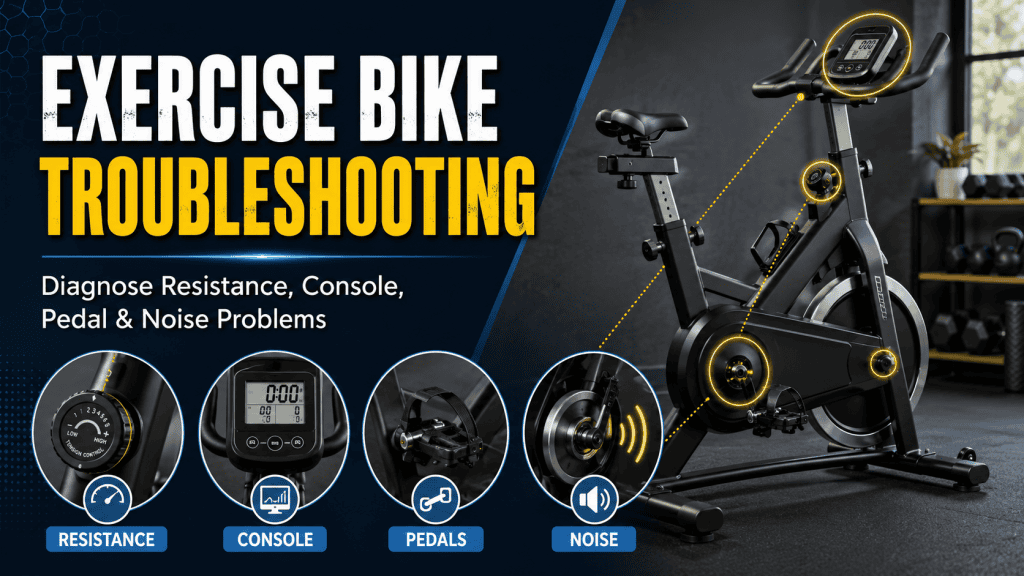
An exercise bike can keep pedalling through a surprising number of faults. The screen can go blank while the resistance still works. The display can look normal while the resistance stays stubbornly light. A click can appear exactly once per pedal revolution, or the bike can feel fine until you stand up and put real load through the drivetrain.
Those behaviours are not interchangeable. Good exercise bike troubleshooting starts with what the machine still does correctly, then uses the missing function to narrow the fault. That is usually faster, safer and cheaper than guessing at a console, resistance motor or flywheel.
This guide is written for upright bikes, recumbent bikes and indoor cycling bikes used in homes and light commercial settings. It also covers the broad logic behind magnetic, friction, electronically controlled and self-powered systems. Your owner’s manual still wins whenever it gives a model-specific procedure, measurement or safety warning.
Quick answer: If your exercise bike is not working properly, first identify the exact symptom and the bike’s resistance and power system. Check the simple things that affect that symptom, such as power, batteries, cable connections, pedal hardware, stabilisers and visible obstructions. Do not remove powered covers or force a stuck drivetrain. A console fault, resistance fault and mechanical pedal fault can look similar from the saddle, but they follow different diagnostic paths.
In this guide 22 sections
Start with the bike you actually have
Before you copy a fix from another model, work out how your bike creates resistance and how its console gets power. Two machines that look almost identical from the outside can behave very differently inside.
| Bike/system | How resistance is created | Typical control | What changes the diagnosis |
| Manual magnetic | Magnets move closer to or farther from the flywheel | Knob and mechanical cable | A disconnected or misrouted cable can leave resistance fixed. |
| Electronic magnetic | A motor or actuator changes magnet position | Console buttons or digital knob | Power, wiring, position feedback and calibration can matter. |
| Friction resistance | A pad presses against the flywheel | Mechanical tension knob | Pad wear, alignment and the tension mechanism matter more than electronics. |
| Air/fan bike | Air drag rises as the fan spins faster | Mostly your pedalling speed | Higher cadence naturally creates more load. A missing resistance knob may be normal. |
| Self-powered / generator | Pedalling generates electrical power and may also create controlled resistance | Console plus generator system | The console may need you to pedal before it wakes up. |
If you are unsure, check the model label and owner’s manual before opening anything. “Magnetic resistance” does not automatically mean the bike has an electronic resistance motor, and a blank screen does not automatically mean a powered bike has lost mains power.
A symptom map before you reach for tools
The most useful clue is usually not the part you suspect. It is the combination of what works, what does not, and when the fault appears.
| What you notice | What that makes more likely | Where to look first |
| Console completely dead | Power, batteries, self-power generation or a disconnected console cable | Power source, battery polarity, adaptor, console/stem connectors |
| Console on, but speed/RPM stays at zero | Movement feedback is missing | Speed sensor, magnet and sensor wiring |
| Resistance number changes, but pedalling feel does not | Resistance mechanism is not following the command | Cable, servo/actuator, magnet carriage, linkage or calibration |
| Resistance neither changes on screen nor in the pedals | Control input or console communication problem | Buttons, console, wiring and power |
| Pedals catch or slip under load | Drivetrain, crank, pedal or freewheel fault | Pedal/crank security, belt or chain, flywheel path |
| Click once per pedal revolution | Pedal, crank, strap or nearby hardware | Pedal threads, crank arm, shoe/strap contact, seat hardware |
| Grinding or scraping | Mechanical contact, bearing wear or drivetrain damage | Stop and locate the sound before continuing |
| Bike rocks or shifts | Levelling or loose frame hardware | Floor, stabilisers, levelling feet, assembly bolts |
| Heart rate missing or erratic | Contact, battery, pairing or sensor issue | Hand position, chest-strap battery, connections |
The five-minute first pass
- Find the model and resistance type. Do not assume a magnetic bike uses the same adjustment system as another magnetic bike.
- Write down the exact symptom. Dead console, zero RPM, no resistance change, slipping, one-click-per-revolution and grinding are different fault paths.
- Check what changed recently. Assembly, a house move, a new adaptor, a new pair of pedals or a period in storage can be more useful than the age of the bike.
- Check the safe external basics. Power, batteries, visible connectors, stabilisers, adjustment knobs, pedal security and obvious obstructions come before internal parts.
- Stop if the fault looks unsafe. Burning smells, electrical damage, a loose crank, severe grinding, a jammed flywheel or an unstable frame are not “one more workout” problems.
If the exercise bike console will not turn on
A dead console is one of the easiest faults to misread because exercise bikes use several different power arrangements. Some run from replaceable batteries. Some use a mains adaptor. Some generate enough power from pedalling to wake the display. A few combine more than one of those ideas.
On a battery-powered bike, start with fresh batteries installed in the correct polarity. Battery contacts can look clean while still failing to make firm contact, so check that the cells are actually seated. On a mains-powered bike, use the adaptor specified by the manufacturer, confirm the wall outlet or mains socket works, and inspect the cable for pinching or damage. Do not substitute a random adaptor just because the plug fits. Voltage, current capability and polarity can differ.
For self-powered bikes, pedalling may be part of the start-up sequence. Decathlon’s EB 520 support page notes that its self-powered console needs pedalling to create electricity when the machine is first used. That behaviour is very different from a conventional battery console that should wake from a button press.
If power is definitely available but the console remains dead, the next safe clue is the cable path you can inspect without dismantling powered electronics. Connections at the back of the console and at the junction between the mast or stem and the frame are common assembly points. A connector that is not fully seated, a bent pin or a cable trapped during assembly can break both console power and resistance communication.
The console works, but speed, distance or RPM stays at zero
A lit display with frozen workout data is a different problem from a dead display. The console has power, but it may not be receiving a reliable signal that the flywheel or crank is moving.
Horizon’s current speed-display troubleshooting guidance starts with console connections, then moves to the speed-sensor wiring and the relationship between the sensor and magnet. That order makes sense for most bikes: check the signal path before blaming the console.
Do not copy a sensor gap from a different model. Sensor type, mounting and clearance vary. What matters is that the magnet passes the sensor where the manufacturer intended and that the wiring between the sensor and console is intact. If the speed reading fails only intermittently, note whether bumps, higher cadence or movement of the handlebars changes it. Intermittent faults often reveal a marginal connector more clearly than a completely dead one.
If the exercise bike resistance is not working
“Resistance not working” can mean at least four different things: the level on screen does not change, the level changes but the pedals feel the same, the bike is permanently too hard, or the resistance jumps around. Before replacing anything, separate those behaviours.
Manual magnetic resistance
On a manually controlled magnetic bike, turning the resistance knob usually moves a cable that changes the position of a magnet assembly. If the bike was just assembled and resistance never worked properly, that cable path deserves attention before the magnets do.
Decathlon UK’s exercise-bike support material gives a useful example: on some models, a resistance problem after assembly can come from the mechanical cable or an assembly spacer that was not removed. That is model-specific, but the diagnostic principle is broader. A knob can turn normally while the mechanism at the other end does almost nothing.
Electronic magnetic resistance
On an electronically controlled magnetic bike, the console sends a command and a motor or actuator moves the resistance mechanism. If the number on the display changes but the pedalling feel does not, the console is at least registering your request. That moves the suspicion farther down the chain: cable connection, resistance motor, linkage, magnet carriage, position feedback or calibration.
If the screen itself refuses to change levels, look higher up the chain first. A dead button, console fault, poor connection or power problem can prevent the command from being issued at all.
Decathlon’s EB SEAT support page gives a model-specific example of why error codes and calibration procedures must stay model-specific. It explicitly links E2 to the motor that manages resistance, and its E2/E3 troubleshooting also tells owners to check cable and connector condition. Use your own model’s procedure rather than a universal “reset” copied from a forum.
Friction resistance
Friction bikes use physical contact against the flywheel. If the resistance knob turns but load does not increase, inspect the adjustment mechanism described in the manual and the condition of the friction pad. If the pad is worn, contaminated or no longer reaches the flywheel correctly, software resets are irrelevant. If the bike also has an emergency-stop function built into the resistance knob, make sure the knob is not stuck in the braking position.
Air and fan bikes
On a fan bike, resistance is largely created by air drag. Pedal faster and the fan pushes against more air, so the load rises naturally. There may be no conventional resistance level to adjust. If the bike suddenly feels too easy despite higher cadence, think about the drivetrain and fan path rather than looking for a missing magnetic-resistance setting.
Resistance is too hard, too easy or inconsistent
A bike that changes resistance but does it badly gives you a different clue from one that never changes at all. First ask whether the problem is consistent. Is level 5 always much harder than it used to be, or does the same level feel different from one minute to the next? Does the resistance fall away only when you stand up or push harder?
On an electronic bike, incorrect calibration or a resistance actuator that is binding can make levels feel wrong. On a manual cable system, poor adjustment or cable routing can shift the entire range. On a friction bike, pad wear can make high settings feel weak. A slipping drive belt can also imitate a resistance problem because your legs accelerate while the flywheel does not receive the same torque.
Horizon’s older owner guidance for its exercise bikes tells owners to verify the correct power cord and reset the console to its default resistance position when resistance seems too hard or too easy. Treat that as a model-family example, not a universal reset sequence.
If the pedals will not turn
A pedal that will not move is not the same as a pedal that merely feels heavy. Do not stand on it or force it with your body weight to “break it free”. That can turn a small obstruction or brake problem into damaged threads, a bent crank or an injury.
On a friction bike, make sure the emergency brake is released and the resistance knob is not wound fully into the flywheel. On a manual magnetic bike, check whether the control has jammed at maximum load. On any design, look for a foreign object around the crank, flywheel guard or pedal path. If the drivetrain stops at exactly the same crank position every time, that is useful evidence of a mechanical interference or damaged rotating component.
If the flywheel is difficult to turn even with resistance at its minimum and nothing external is obstructing it, stop there unless the manufacturer provides a safe inspection procedure. Bearings, belts, chains, freewheels and internal brake assemblies are not good places for powered trial-and-error testing.
Exercise bike pedals slipping, catching or feeling disconnected
When people say the pedals are slipping, they may mean three different things. The shoe may be moving in the pedal or strap, the pedal or crank connection may be loose, or the crank can turn while the flywheel momentarily fails to follow. Those need different fixes.
Start outside the covers. Check pedal straps or clips, then check whether either pedal rocks on its spindle or whether a crank arm moves independently of the crank axle. If the pedals and cranks feel solid but the flywheel hesitates under load, the drive belt, chain, idler or freewheel moves higher on the list.
Important pedal-thread warning: On standard cycle-style cranksets, the left and right pedals normally use opposite thread directions. Decathlon’s support material explicitly identifies the right pedal as clockwise-tightening and the left as anti-clockwise-tightening on its bikes. Confirm your own manual before removing a pedal. Forcing the wrong direction can damage the crank.
A click once per pedal revolution is a useful clue
A rhythmic click that happens once every time the same pedal comes around often points you towards the pedal and crank area before the flywheel. That does not guarantee the pedal is loose, but it gives you a place to start.
Horizon’s exercise-bike maintenance guidance includes routine checks of pedal and crank bolts. Decathlon UK also tells owners to check pedal and crank installation when a click occurs on every pedal turn.
Before touching the pedal, rule out the silly things that sound mechanical: a shoelace tapping the cover, a loose strap buckle, a bottle in the holder, or a seat component moving under your weight. Then compare left and right. If the click happens under your right foot only, that is more informative than a sound that tracks flywheel speed.
Squeaking, grinding, scraping and knocking
Noise is easiest to diagnose when you describe its rhythm and when it appears. A squeak that follows each pedal stroke, a fast rub that follows flywheel speed and a knock that appears only when you stand are three different clues.
Loose assembly hardware and an uneven floor can create more noise than people expect. Both Horizon and Decathlon include hardware and stability checks in their bike maintenance or support guidance. That is a sensible first pass because it is external, low-risk and easy to verify.
Grinding is different. If you can feel the grind through a pedal or the frame, or if the noise worsens quickly, stop using the bike. Bearings, a damaged belt or chain, a misaligned flywheel or metal-to-metal contact can continue to damage nearby parts.
Do not use “lubricate everything” as a fix: Exercise bikes use different bearings, bushings, chains, belts, friction pads and sealed assemblies. A product that needs chain lubrication is not evidence that a magnetic bike’s sealed bearings or belt need spray lubricant. Follow the model’s maintenance instructions and keep lubricant away from braking surfaces unless the manufacturer explicitly specifies it.
If the bike wobbles or rocks during a workout
Stability faults deserve attention because they change the load on the frame, seat and crank every time you pedal. Start with the floor. A hard floor can be level but still have a local dip, while thick carpet can let one stabiliser sink more than the other.
Set the bike where you intend to use it, then adjust the levelling feet or stabilisers if your model has them. Check the frame hardware that was installed during assembly. Do not use folded cardboard as a permanent levelling solution on a machine that will be loaded repeatedly.
Decathlon’s Initial Bike support page and several of its current exercise-bike pages pair stability checks with noise complaints, which is a good reminder that a rocking frame can sound like a drivetrain fault.
If the seat or handlebars move when they should be locked
A slipping seat post or handlebar clamp is usually an adjustment or wear problem, but it becomes a safety problem once the part can move unexpectedly under body weight. Remove the load, inspect the locking pin or clamp, and make sure the adjustment is actually engaged in the position intended by the manufacturer.
Do not compensate for a worn or damaged locking mechanism by overtightening unrelated bolts. If a pop-pin no longer seats fully, a threaded knob is stripped or the seat rail clamp will not hold, the damaged part needs attention before the next workout.
Heart-rate readings that stay at zero or jump around
Hand-grip pulse sensors are sensitive to contact. Dry hands, a light grip or only one hand on the contacts can prevent a reading. Chest straps add their own variables, including battery condition, pairing and placement.
For troubleshooting, treat the heart-rate system separately from the resistance and drivetrain unless the same cable bundle or console failure affects both. If the bike otherwise works normally, a missing pulse reading does not usually mean the resistance system is failing.
Do not use a home exercise bike’s pulse display to make medical decisions. If you need reliable heart-rate information for a health reason, use an appropriate device and professional advice.
Error codes and smart-bike problems need model-specific answers
An E2 on one brand does not have to mean the same thing as E2 on another. The same is true of calibration menus, service modes and firmware resets. Search using the exact brand, model and code shown on the display, then prefer the manufacturer’s support page or manual.
For connected bikes, separate app trouble from machine trouble. If Bluetooth will not pair but manual resistance works and the console still reads cadence, you have a different problem from a bike whose resistance motor is unresponsive. Record which functions survive before you reset accounts, update firmware or reinstall apps.
Problems that start after assembly or after moving the bike
A bike that worked yesterday and fails immediately after being moved has given you a valuable clue. So has a brand-new bike that has never behaved correctly.
- Console or resistance both fail after assembly: recheck the plug connections at the console, stem and frame. A trapped or partially seated cable can affect more than one function.
- Resistance is fixed from the first use: check the assembly steps for the resistance cable, shipping spacers and connector orientation before assuming the brake system is defective.
- Bike rocks after a move: readjust levelling feet on the new floor and confirm the stabilisers are tight.
- A click appears after pedals were removed: confirm the correct pedal is on each side, that threads started cleanly and that tightening follows the manual.
- Console is blank after a move: check the adaptor and console cable before replacing the display.
What you can check safely before removing covers
Most owners can learn a lot without touching the internal electrical or resistance system. The point is to narrow the fault, not to prove you can reach every component.
- Model number, power type and resistance type.
- Batteries, correct adaptor and working wall outlet or mains socket.
- Visible console and stem connectors that the owner’s manual expects you to access.
- Pedal and crank security, using the manufacturer’s thread directions and torque guidance.
- Stabilisers, levelling feet and assembly hardware.
- Whether the symptom changes with cadence, resistance, body load or one particular pedal.
- Whether the console loses power, only loses metrics, or stays fully functional.
- Whether a noise follows pedal speed, flywheel speed or movement of your body on the bike.
Once a check requires powered testing with covers removed, probing live circuits, defeating guards, holding a moving belt or chain, or running the bike with hands near rotating parts, it has crossed into service-procedure territory.
Maintenance that prevents a surprising number of faults
The best maintenance schedule is the one in your own manual, but there is useful common ground. Sweat is corrosive, pedals and crank hardware carry repeated load, and loose frame hardware can create both noise and movement.
Horizon’s current care and maintenance page calls for cleaning the console and frame, checking pedal and crank bolts, securing hardware and inspecting the power cord. Life Fitness’ air-bike maintenance schedule likewise treats pedals, straps, hardware and levellers as recurring inspection points.
That is a better foundation than a generic “oil it every month” rule. Wipe sweat away, keep the floor around the bike clean, inspect what the manufacturer tells you to inspect, and do not add lubricant to a component simply because another type of exercise bike uses it.
When to stop using the exercise bike
Stop the workout and leave the bike out of service if you notice any of the following:
- A pedal or crank arm is visibly loose, cracked, bent or separating from its mounting.
- The flywheel, crank or pedals jam or stop abruptly.
- Grinding, scraping or knocking becomes severe or is accompanied by vibration.
- You see damaged wiring, sparks, smoke, melting, or smell burning insulation.
- A plug, adaptor or electrical connector becomes unusually hot or discoloured.
- Resistance changes suddenly or unpredictably in a way that could make you lose balance.
- The frame, seat or handlebars cannot be locked securely.
- The bike rocks enough that a stabiliser or foot lifts during normal use.
- A cover or guard is damaged and exposes a belt, chain, fan or other moving component.
If the bike is under warranty, this is also the point to check the warranty terms before opening covers. An unnecessary DIY repair can make a straightforward support claim harder.
Repair, service or replace?
A loose connector and a failed console are both “electrical faults”, but they have very different repair costs. The same is true of a pedal that only needs correct installation versus a damaged crank thread, or a resistance cable that came loose versus an electronic brake assembly that needs diagnosis.
Before buying parts, get the exact model and serial number, confirm the suspected part is actually used on your version, and check whether the manufacturer still supports it. For older smart bikes, the availability of a console or control board can matter more than the price of a mechanical bearing. For simple friction or manual magnetic bikes, the opposite can be true.
If a technician is needed, give them the symptom pattern rather than a guessed part. “The resistance number changes on screen but the pedal load never changes” is much more useful than “I think the motor is bad”.
Frequently asked questions
Why is my exercise bike not working after I moved it?
Start with what was disturbed during the move: the adaptor, console cable, stem connector, levelling feet and any parts that were removed for transport. If the bike worked immediately before the move, a connection or set-up change is usually worth checking before an internal component.
Why is my exercise bike resistance not working even though the level changes on screen?
That pattern means the console is registering the command, but the resistance mechanism may not be following it. On electronic magnetic bikes, the fault can sit in the resistance motor or actuator, linkage, magnet carriage, wiring, position feedback or calibration. On a manual system, the mechanical cable may not be moving the brake or magnet mechanism as expected.
Why is my exercise bike console not working but the pedals still turn?
Pedals can turn mechanically even when the display has no power. Check whether the console uses batteries, a mains adaptor or self-generated power, then inspect the power source and accessible console connections. If the display has power but workout data stays at zero, move to the speed-sensor signal path rather than treating it as a completely dead console.
Why are my exercise bike pedals slipping under load?
First determine what is actually slipping. Check the shoe, strap or clip, then the pedal and crank connection. If those are solid but the crank turns while the flywheel hesitates, the drive belt, chain, idler or freewheel may be involved. Stop if the crank or pedal itself is loose.
Why is my exercise bike making noise once every pedal turn?
A once-per-revolution click often points towards the pedal, crank, strap or something that moves with your body position. Check pedal installation and crank security, then rule out straps, shoelaces and seat hardware before looking deeper into the drivetrain.
Can I spray lubricant on a squeaky exercise bike?
Not as a general fix. Bikes use different materials and drive systems, and lubricant can damage some belts, attract dirt or contaminate friction-braking surfaces. Use only the lubricant and application points specified for your exact model.
Why does my stationary bike get harder when I pedal faster?
That can be normal on an air or fan bike because air resistance rises with fan speed. Some generator-based commercial bikes can also behave differently from simple magnetic home bikes. If your model is supposed to hold a selected electronic resistance level and the change feels erratic, check the manual and diagnose it as a resistance-control issue instead.
Can I use a different power adaptor if it fits the socket?
Do not assume so. Matching plug size is not enough. Output voltage, current rating, polarity and connector design must match the manufacturer’s requirements. Use the specified adaptor or an explicitly compatible replacement.
Is stationary bike troubleshooting different for upright and recumbent bikes?
The riding position changes, but the resistance, console and drivetrain design matter more for diagnosis. An upright and a recumbent bike can share the same magnetic resistance logic, while two upright bikes can use completely different systems. Start with the model and mechanism rather than the frame shape.
The bottom line
A good exercise bike diagnosis usually begins with one observation: what still works when the fault appears. If the console is dead, start with power. If the console is alive but RPM is missing, follow the movement signal. If the resistance level changes on screen but not at the pedals, move down the resistance-control chain. If the problem happens once per pedal turn, start around the pedal and crank before blaming the flywheel.
The goal is not to turn every owner into a service technician. It is to avoid the expensive guess, the unsafe shortcut and the unnecessary replacement. Identify the system, follow the symptom, and stop when the next step belongs in a service manual rather than an owner’s guide.
Sources
Horizon Fitness: Exercise Bike Care and Maintenance – Current maintenance guidance covering console/frame cleaning, pedal and crank checks, hardware and power-cord inspection.
Horizon Fitness: Issues with Speed Display on Exercise Bike – Current support guidance for console connections, speed-sensor wiring and sensor/magnet alignment.
Johnson Health Tech / Horizon exercise bike owner guidance – Verified manufacturer PDF covering console connections, speed sensing, resistance reset guidance, pedal clicking, squeaking and sealed-bearing maintenance.
Decathlon UK: Initial Bike support – UK support guidance covering console power, resistance, noise, clicking pedals and stability.
Decathlon UK: DOMYOS EB 520 support – Self-powered console behaviour, cable/connector checks, resistance errors and noise guidance.
Decathlon UK: DOMYOS EB SEAT support – Model-specific examples of E2/E3 resistance-motor faults, console configuration and noise checks.
Decathlon UK: DOMYOS EB 120 support – Official support guidance covering resistance-cable assembly, pedal/crank clicking, stability checks and routine maintenance.
Life Fitness: Hammer Strength HD Air Bike Preventative Maintenance – Manufacturer maintenance schedule covering pedals, straps, hardware, levellers and cleaning.