
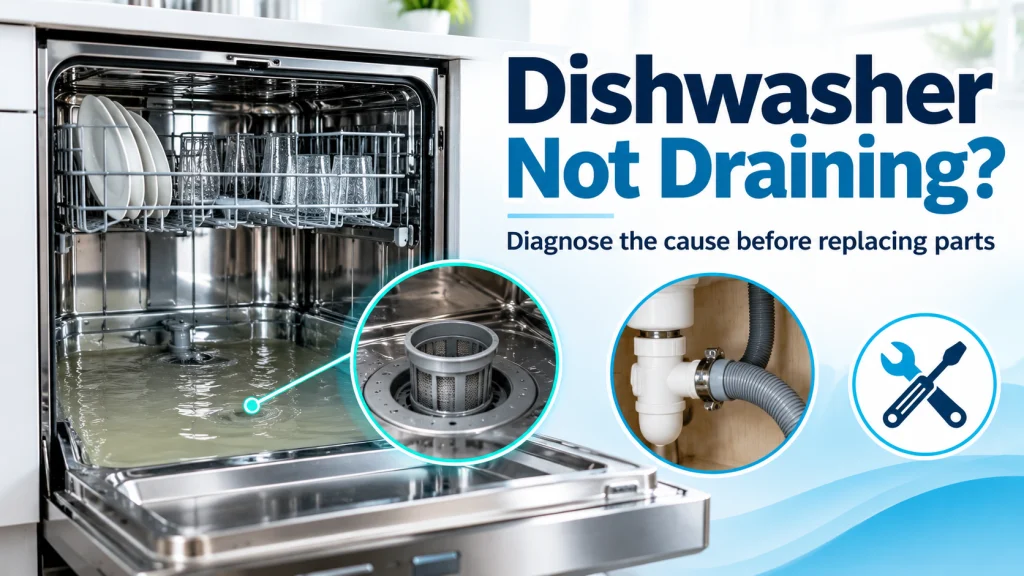
You open the dishwasher after the cycle and there is water sitting in the bottom. The obvious suspect is the drain pump. That is also one of the easiest ways to spend money before you have diagnosed the fault.
A dishwasher that never pumps water out, one that drains only when you press Cancel/Drain, and one that empties normally but fills with dirty water again a few hours later are three different problems. They can leave almost the same puddle, but they do not point to the same part.
The useful question is not simply, “Why is my dishwasher not draining?” It is: when did the water fail to leave, and what did the machine do when it tried? Once you answer that, the filter, pump, drain hose and sink plumbing can be checked in an order that actually makes sense.
| Quick answer If a dishwasher is not draining, first confirm that the cycle really reached a drain step. Then separate four patterns: it never drains, it drains slowly, it drains only when Cancel/Drain is forced, or it drains and water returns later. Clean the owner-serviceable filter and sump, check the hose and sink/disposer connection, and verify the required high loop or air gap before blaming the drain pump. |
| Safety first Disconnect electrical power before removing filters, pump covers, hoses or access panels. Shut off the water supply if you will disturb plumbing connections. Stop if there is burnt wiring, repeated breaker/RCD/GFCI tripping, leaking near electrical parts or a repair that requires exposed live testing. Never put a hand into a waste disposer, even if it is switched off. |
If the dishwasher has other symptoms as well, start with the broader Dishwasher Troubleshooting guide. It helps identify whether drainage is really the first stage that failed.
First, decide what kind of drainage problem you actually have
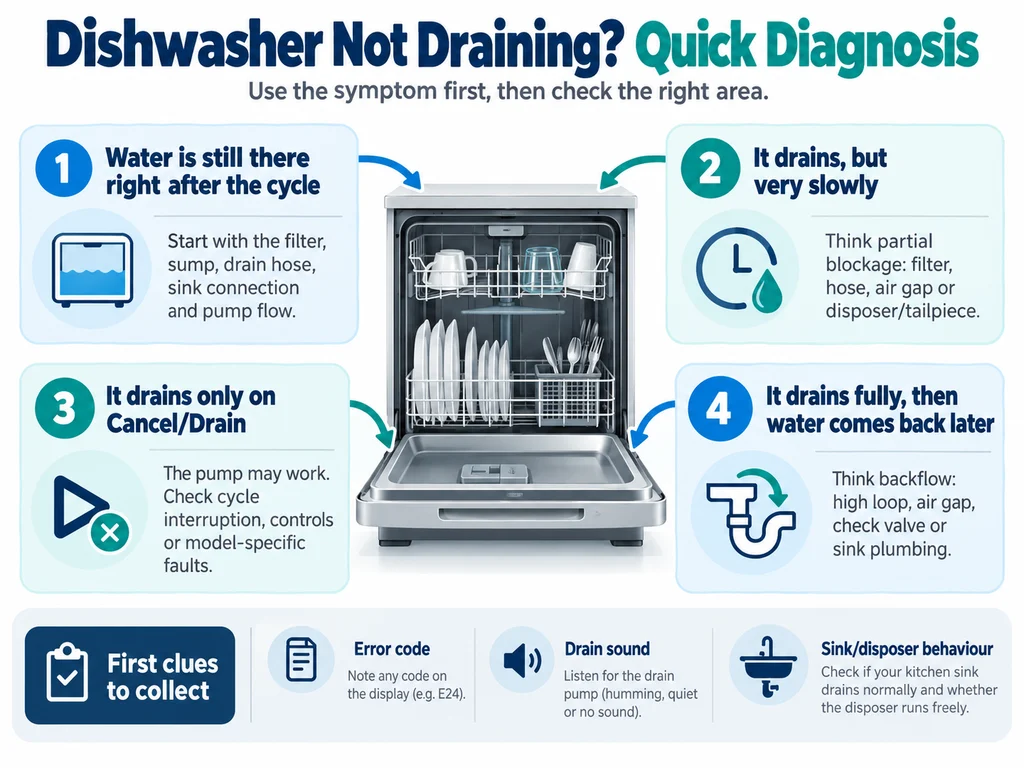
Do this before removing anything. Run or recall one cycle and describe the behaviour as precisely as you can. The timing is often more useful than the amount of water.
| What you observe | What it usually means | Where to start |
| Water is still across the tub floor immediately after the cycle | The drain step did not remove enough water | Filter/sump, hose, sink connection, pump operation |
| The dishwasher drains, but very slowly | There is flow, but it is restricted | Filter, hose, air gap, disposer/tailpiece, partial blockage |
| It will not drain at the end of a programme, but Cancel/Drain empties it | The pump and drain path may be capable of working | Cycle interruption, sensing, control logic or model-specific fault |
| It drains fully, then water appears again later | Think backflow or fresh-water seepage, not “failed to drain” | High loop/air gap, sink plumbing, check valve, inlet side |
| You hear a firm hum/buzz but little or no water leaves | The pump may be energised but unable to move water | Obstruction, jammed impeller, blocked hose/check valve, weak pump |
| There is no drain-pump sound at all | The pump may not be commanded or powered, or the pump may be open/faulty | Error code, door/cycle state, wiring/control diagnosis |
| The problem started after a new disposer, sink or dishwasher installation | Installation moves to the top of the list | Knockout plug, kinked hose, hose routing, air gap/high loop |
That distinction matters because manufacturer guidance from Whirlpool, GE, Bosch, Electrolux, LG, KitchenAid and Samsung repeatedly starts with the same broad areas: filtration, the sump or pump area, drain-hose routing and the household drain connection. The failed component is not always inside the dishwasher.
Is a little water in the bottom actually normal?
Possibly. “There is water in my dishwasher” is not enough by itself to diagnose a fault.
On some designs, a small amount of clean water remains in the sump or filter well by design. GE, for example, states that on some models without its Ultra Fine Filter, roughly one to two cups of clean water covering the bottom area can be normal. LG also notes that water below the filter can remain as part of the design. Other models should leave the visible tub floor essentially clear.
Use the shape and location of the water rather than an internet measurement copied from another dishwasher:
- Water hidden down in the recessed filter or sump area may be normal for that model.
- Water spread across the flat tub floor after a completed cycle is more suspicious.
- Water high enough to approach the door is not a normal residual puddle.
- Dirty or smelly water that appears after the dishwasher had already emptied suggests backflow rather than ordinary sump water.
Check the user manual for the exact model before deciding that every visible drop must be removed.
Before you reset anything, collect three clues
1. Record any error code or flashing-light pattern. Take a photo before power cycling the machine.
2. Listen during the drain step. Is there no sound, a normal strong pump sound, a weak hum, grinding, or repeated attempts?
3. Check the kitchen sink at the same time. A slow sink, gurgling disposer, overflowing air gap or recent plumbing work can move the fault outside the dishwasher.
Also find the model number. Filters, pump covers, check valves, forced-drain commands and error codes vary enough that the exact manual should take priority over a generic procedure.
If you have a code, preserve it and then check the manufacturer documentation or the FixDecoded Error Code Decoder. A code describes what the control detected; it does not always name the failed part.
1. Make sure the dishwasher actually reached a drain step
An interrupted cycle can leave perfectly ordinary wash water inside the tub. A power cut, opened door, paused programme or cancelled cycle can make a drainage fault appear when the machine simply never completed the drain stage.
Use the model-specific Cancel/Drain or forced-drain command if the manual provides one. Then watch what happens.
- If the dishwasher immediately pumps the tub empty, the drain pump and path have proved that they can work at least under that condition.
- If it only partially drains, look for a restriction or weak flow rather than assuming the pump is completely dead.
- If the pump can be heard but no water reaches the sink connection, trace the path for an obstruction.
- If nothing happens during a commanded drain, the diagnosis may eventually move towards the pump circuit, wiring, control or model-specific sensing.
Do not keep resetting a machine that repeatedly returns the same drain code. The repeated fault is evidence.
2. Remove enough standing water to inspect the filter safely
If the tub is full, remove the lower rack and bail out enough water to work without spilling it into the kitchen. A cup, sponge, turkey baster or small hand pump is more controlled than tipping the machine or disconnecting a hose while it is still full.
Disconnect power first. Broken glass often ends up in the same sump area you are about to inspect, so wear gloves and do not sweep your fingers blindly around the pump opening.
3. Clean the filter, then inspect what the filter was protecting
A blocked filter is an obvious place to start, but there are two mistakes here. The first is cleaning only the visible surface. The second is assuming every dishwasher has the same owner-removable filter and pump cover.
If your manual shows a removable filter:
1. Lift out the lower rack.
2. Unlock and remove the filter exactly as the manual describes.
3. Rinse the mesh and cylindrical sections under running water. Use a soft brush if grease or fine residue is packed into the mesh.
4. Look into the exposed sump for food fragments, labels, seeds, pieces of bone or glass that can obstruct flow.
5. Reinstall the filter fully and lock it into position. A filter sitting crooked can create new wash and drainage problems.
Bosch goes one step further on models with an owner-accessible pump cover: after the water is removed and power is disconnected, its guidance shows how to remove the pump cover and check for foreign objects. That procedure is model-specific. Do not assume a cover should pry off because a video for another brand shows one.
A useful clue If the dishwasher had been draining more slowly for several cycles before it stopped, a developing restriction is more plausible than a pump that failed instantly. If the fault appeared suddenly after a glass broke inside the machine, hard debris near the pump becomes more interesting.
4. Check the drain hose under the sink before pulling the dishwasher out
The section of hose you can see under the sink causes a surprising number of “bad pump” diagnoses.
Look for:
- a sharp kink where the hose enters the cabinet;
- a heavy bottle, bin or stored item crushing the corrugated hose;
- a low sag that appeared after plumbing work;
- a loose connection at the sink tailpiece, disposer or air gap;
- greasy debris packed into the hose end or the small dishwasher inlet at the disposer/tailpiece.
A hose can pass some water and still be restricted enough to leave water behind. That is why “I can blow through it” does not always prove the entire drain path is healthy under real flow. The narrow connection where the hose meets the household plumbing deserves the same attention as the long hose itself.
If you disconnect the hose at the sink connection, place a shallow tray and towels underneath first. Even after the tub has been bailed out, the hose can hold dirty water.
5. If a waste disposer was recently installed, check the knockout plug
This is one of the highest-value checks in the whole article because the timing is so distinctive.
Many disposers are supplied with the dishwasher inlet sealed by a knockout plug. If a dishwasher hose is connected to that inlet without removing the plug, the pump has nowhere to send the water. Whirlpool, KitchenAid, GE and Electrolux all specifically call this out in their drain guidance.
So if the dishwasher stopped draining immediately after a disposer replacement or a new installation, check the installation before replacing a pump. The same logic applies to a new sink tailpiece that has not been opened correctly for the dishwasher connection.
Follow the disposer manufacturer’s installation instructions for removing the plug. Do not put your hand into the disposer chamber.
6. Check the high loop or air gap, especially if water comes back later
The drain hose does more than carry water away. Its routing helps stop dirty sink water from returning to the dishwasher.
Depending on the dishwasher, installation and local plumbing rules, the drain is typically routed using a high loop or through an air-gap fitting. Bosch installation instructions, for example, require the drain hose to use either a high loop or an air gap and specify a model installation height. Electrolux similarly specifies a minimum drain-hose height in its guidance. Those numbers are not universal, so use the installation instructions for your actual machine and local requirements rather than copying one height from another brand.
The symptom pattern is what matters:
- Dishwasher empties normally, but dirty water is back in the tub after the sink has been used: investigate backflow and hose routing.
- Water or debris spits from the countertop air gap while the dishwasher drains: the restriction is often downstream of the air gap, towards the disposer or sink drain.
- The sink itself drains slowly or backs up: treat the household drain as part of the problem.
- The hose was recently moved lower under the sink: restore the model-required routing.
Do not confuse two different faults Dirty or smelly water returning after the machine had emptied points towards the drain side. Clean water slowly appearing in an idle dishwasher can point towards the inlet side, such as an inlet valve that is not sealing completely. Both leave “water in the dishwasher”, but they need different diagnosis.
7. What the drain-pump sound can tell you
The pump sound is not a perfect test, but it changes the next question.
In this guide 12 sections
The pump sounds strong and water moves
If you can hear a normal drain sound and see a strong discharge into the sink/disposer connection, the pump is doing useful work. If water still remains, look for partial restriction, backflow, cycle behaviour or a model-specific issue rather than declaring the pump dead.
The pump hums, but little or no water leaves
A hum means the pump may be energised, but it does not prove the impeller is turning freely or producing useful flow. Hard debris can jam the impeller. A check valve can be obstructed. A hose can be blocked. The pump itself can also be mechanically weak or damaged.
This is where many owners replace the pump too early. Real repair discussions repeatedly show cases where a new pump did not solve the problem because the restriction, connection, check valve or control side had not been isolated first.
The pump grinds or rattles during drainage
Stop repeatedly running it and inspect the owner-accessible sump or pump area using the model instructions. Glass, seeds, bone fragments and small plastic pieces can make a surprisingly harsh sound. Continued testing can turn a removable obstruction into a damaged pump.
There is no pump sound at all
The absence of sound is more complicated. The pump may have failed electrically, but the control may also not be commanding it, a wire or connector may be open, or the cycle may not have reached the drain step you think it did.
Once the filter, hose, sink connection and model-specific owner checks are complete, confirming whether a pump is being supplied correctly can require electrical measurements with the machine in a powered state. That is the point where a qualified appliance technician is the safer next step for many owners.
8. If it drains on Cancel/Drain but not at the end of a normal cycle
This is one of the most valuable diagnostic results because it proves more than a simple puddle does.
If a forced drain removes the water strongly, the pump can run and the hose can pass water under that condition. That does not prove every part of the drain system is perfect, but it makes a completely dead pump or totally blocked hose less convincing.
Now ask why the normal programme did not produce the same result. Possibilities vary by design, but the investigation can move towards:
- the cycle being interrupted before its final drain;
- a model-specific water-level or pressure-sensing problem;
- control logic, timer or relay behaviour;
- a fault code that was cleared before it was recorded;
- an intermittent electrical connection that behaves differently as the machine heats and vibrates.
Do not order a control board from that list alone. The point is to change the diagnostic direction. A dishwasher that can force-drain strongly is giving you different evidence from one whose pump only hums against a blocked outlet.
9. If the dishwasher drains, then fills with water again hours later
This is often described as “not draining”, but the original drain may have worked perfectly.
First determine what kind of water came back:
- Dirty, grey or smelly water after the sink or disposer has been used suggests drain backflow. Check the high loop or air gap, sink/disposer connection, check valve where applicable and downstream plumbing.
- Clear water entering while the dishwasher is switched off points away from the drain path. Watch the fill area for a slow seep and use model-specific service guidance for the inlet system.
That distinction can save an unnecessary drain-pump replacement because the pump may have completed its job hours earlier.
10. Test the drain path in sections instead of guessing
If the simple checks have not found the fault, isolate the path logically. An experienced DIYer can sometimes disconnect the drain hose at the sink connection, place it securely into a bucket and use the dishwasher’s drain command to see whether the machine can discharge there. This bypasses the disposer/tailpiece and downstream sink connection.
Important Only do this if the hose can be secured safely, the bucket can hold the discharge and the procedure does not require exposing live parts. Dishwasher drain water can be hot. If the model or installation makes the hose difficult to access, stop rather than improvising around powered components.
The result can be useful:
- Strong flow into a bucket but poor drainage when reconnected points towards the sink/disposer/air-gap side.
- Little or no flow into the bucket keeps the dishwasher-side hose, check valve, pump area and pump performance in play.
- Intermittent flow can justify inspecting for debris that shifts position or a pump that is not starting consistently.
This section-by-section approach is far more informative than replacing the pump simply because it is the component whose name contains “drain”.
When a drain pump really does become a strong suspect
A pump should move up the list when the drain path is known to be clear, the filter and sump are correctly assembled, the sink connection is open, hose routing is correct and the pump still cannot create useful flow.
Examples include:
- the pump repeatedly hums with no obstruction found and the impeller is damaged or does not move as the service procedure expects;
- the pump is mechanically noisy after hard debris has been removed and flow remains poor;
- the exact model’s diagnostic procedure identifies a pump fault after the external restrictions have been ruled out;
- a technician confirms the pump is receiving the correct supply during a drain command but is not operating correctly.
That is very different from “there is water in the bottom, therefore the pump is bad”.
What not to do when a dishwasher will not drain
- Do not pour household drain cleaner into the dishwasher. GE specifically advises against using drain cleaner in the appliance, and strong chemicals can create damage or a hazardous repair situation.
- Do not keep resetting the same drain error without recording it first.
- Do not replace the pump before checking a recently installed disposer knockout plug.
- Do not assume a hose is clear because the section under the sink looks clean.
- Do not copy a high-loop height from a different brand. Follow the installation instructions for the actual model and local plumbing requirements.
- Do not put your hand into a waste disposer to look for a blockage.
- Do not run repeated drain attempts if the pump is grinding on glass or another hard object.
- Do not bypass the door switch, float, earth/ground connection or another safety device to make the dishwasher run.
A practical ten-minute diagnosis
1. Photograph any error code and find the full model number.
2. Confirm whether the water was there immediately after the cycle or returned later.
3. Use the model’s Cancel/Drain command and listen to what the pump does.
4. Check whether the kitchen sink, disposer or air gap is also draining badly.
5. Disconnect power, remove enough standing water to work safely and clean the owner-serviceable filter.
6. Inspect the accessible sump or pump area only as the model manual allows.
7. Inspect the visible drain hose for kinks, crushing and poor routing.
8. If a disposer or sink connection was recently replaced, verify the dishwasher inlet is actually open.
9. Confirm the required high loop or air-gap arrangement.
10. Only after the drain path is known to be clear should the pump, wiring, sensing and control side become the main suspects.
When to stop DIY troubleshooting
Book appliance service when the external drain path is clear but the pump will not run, the machine repeatedly reports a drain error with no accessible obstruction, or the next useful step requires live voltage measurements, control-board diagnosis or significant disassembly.
Call a plumber rather than an appliance technician when the dishwasher drains strongly into a bucket but backs up when connected to the sink system, the sink itself is slow or blocked, or the problem clearly sits downstream in the household drain.
Stop immediately for burnt wiring, smoke, repeated breaker/RCD/GFCI tripping, water reaching electrical components, a damaged power connection or uncontrolled filling.
If the appliance is under warranty, check the warranty conditions before removing access panels or dismantling the pump assembly.
Frequently asked questions
Why is there water in the bottom of my dishwasher after a cycle?
A small amount in the recessed sump or filter area can be normal on some models. Water spread across the tub floor after a completed programme usually deserves investigation. Check the model manual, then work through the filter, sump, drain hose, sink connection and pump behaviour.
How do I force my dishwasher to drain?
Many dishwashers use a Cancel/Drain command, often by holding a button for a few seconds, but the exact control sequence varies. Use the user manual for your model. If a forced drain works strongly while the normal cycle leaves water behind, that result is diagnostically useful and should change what you investigate next.
Why is my dishwasher humming but not draining?
A hum can mean the pump is being energised but cannot move water. Check for debris in the model-accessible pump area, a blocked or kinked hose, an obstructed check valve where fitted, and a blocked disposer/tailpiece connection. The pump itself can also fail mechanically, but do not skip the restrictions first.
Why did my dishwasher stop draining after installing a new garbage disposal?
Check the disposer’s dishwasher inlet. Many new disposers leave that inlet sealed with a knockout plug until a dishwasher is connected. If the hose is attached while the plug is still present, the dishwasher cannot discharge through that connection.
Why does water come back into the dishwasher after it drains?
Dirty water returning later usually points towards backflow from the sink/drain system, incorrect drain-hose routing, an air-gap problem or a check-valve issue where applicable. Clear water slowly entering an idle dishwasher can instead point towards the inlet side. Identify which kind of water is returning before replacing drain parts.
Can I use drain cleaner, baking soda or vinegar to unclog a dishwasher?
Do not use household drain cleaner in the dishwasher. A drainage fault is better diagnosed by physically checking the filter, sump, hose and plumbing connection. Baking soda and vinegar may foam and deodorise, but they do not prove or reliably remove a solid obstruction in a drain hose or pump path.
How do I know if the drain pump is bad?
A bad pump becomes more likely after the filter, sump, hose, disposer/tailpiece, air gap or high-loop arrangement and downstream drain have been ruled out. A humming pump with no obstruction, damaged impeller, persistent mechanical noise, model-specific pump fault or confirmed correct electrical supply without proper pump operation are stronger evidence than standing water alone.
Should there be a high loop in the dishwasher drain hose?
Many installations require a high loop or an air gap to reduce backflow, but the exact arrangement and height depend on the appliance instructions and local plumbing rules. Follow the installation manual for the specific dishwasher rather than a universal measurement from the internet.
The diagnostic shortcut worth remembering
A puddle is the end result, not the diagnosis.
If the dishwasher never drains, trace the path the water should have taken. If it drains slowly, look for restriction. If it force-drains but fails at the end of a normal programme, the pump has already proved something useful. If it drains and water returns later, investigate backflow or fresh-water seepage instead of repeating the same pump checks.
Work from the filter and household plumbing towards the internal electrical parts. That order is safer, cheaper and much more likely to tell you why the water is there before you buy a part.
Still not sure which dishwasher stage failed? Use the FixDecoded Dishwasher Troubleshooting guide or work through the Fault Finder from the symptom you can actually observe.
Sources
- Whirlpool Product Help: Dishwasher Not Draining
- GE Appliances: Dishwasher – Not Draining
- Bosch: Dishwasher water does not drain
- Electrolux: Dishwashers – Not Draining
- Electrolux: Dishwasher Drain Hose Guide
- LG Support: Dishwasher error codes and OE drain guidance
- KitchenAid Product Help: Newly Installed Dishwasher Not Draining
- Samsung US: Dishwasher FAQ
- Bosch dishwasher installation instructions: drain connection requirements
- This Old House: How To Fix a Dishwasher That’s Not Draining
- Bob Vila: What to Do When Your Dishwasher Is Not Draining
- Reddit r/appliancerepair: pump replaced, still not draining
- Reddit r/appliancerepair: incomplete drain despite pump replacement
- Reddit r/appliancerepair: control/timing issue after pump and hose checks
- Reddit r/appliancerepair: blocked disposal connection resolved drain problem